
This guide explains how to manually install your new eSIM on an iPhone. This option is helpful if you prefer not to use the Quick Install feature, or if you want to send the eSIM details to someone else so they can install it on their own iPhone. This guide covers the full process, from accessing your eSIM installation details to completing the installation and enabling data roaming.
Before you begin, please make sure you have the following:
A stable internet connection
An iPhone that supports eSIM
An iPhone that is carrier-unlocked
Part 1: Get Your eSIM Installation Details
Open the DataFly app.
Tap "My eSIMs".
Tap "Manual Install" for the eSIM you want to install.
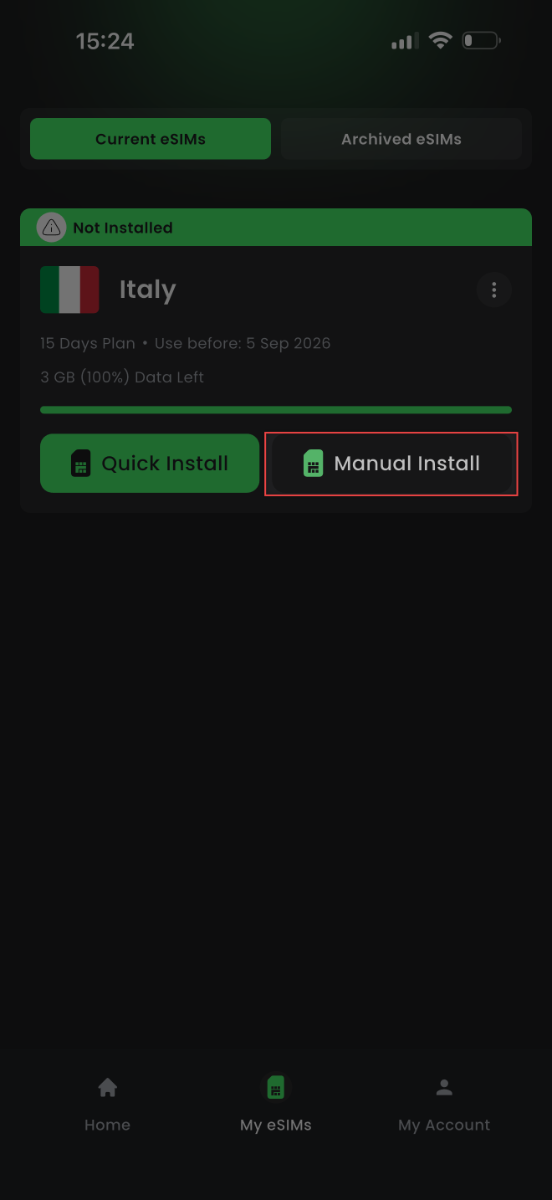
To continue, choose one of the following options:
Copy the SM-DP+ Address and Activation Code
Save the QR Code to your device, or share it directly with someone else by tapping "Share"
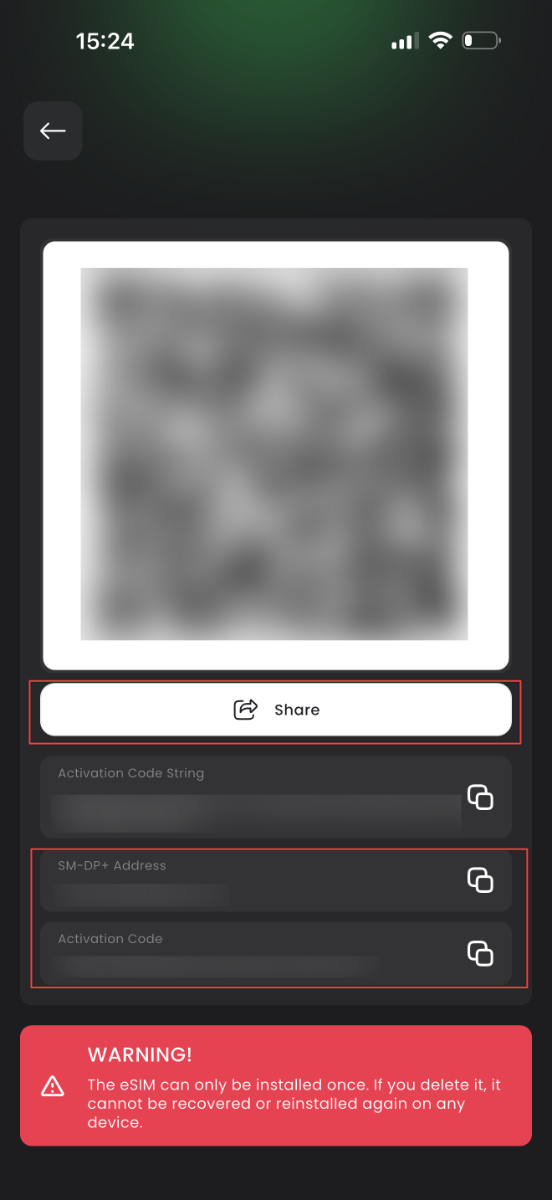
After copying the SM-DP+ Address and Activation Code, or saving the QR Code, continue to Part 2 to begin the installation.
Part 2: Manually Install the eSIM on iPhone
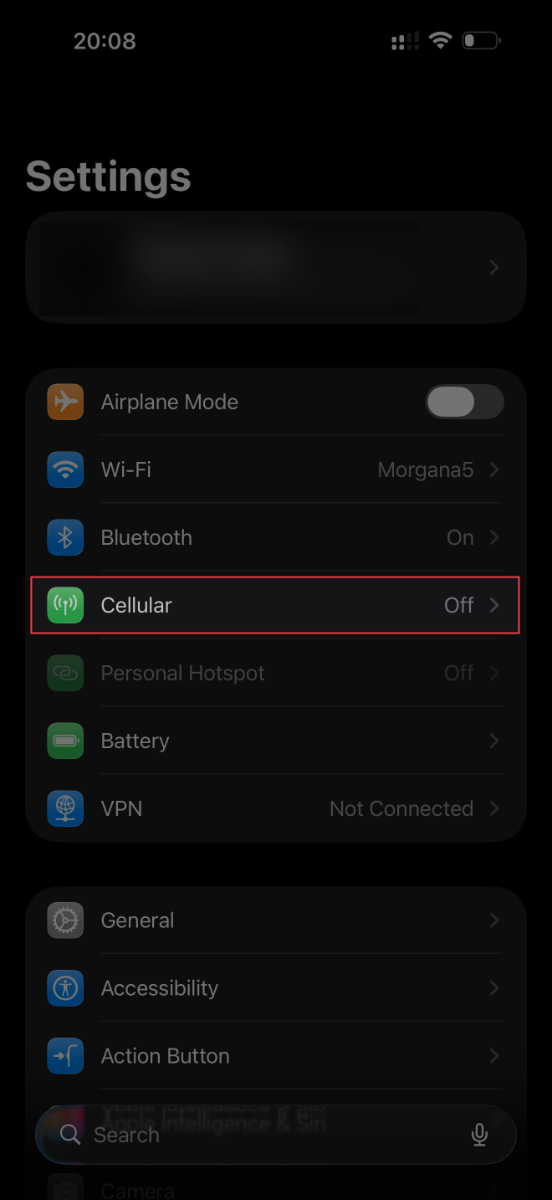
Open your iPhone Settings.
Tap "Cellular".
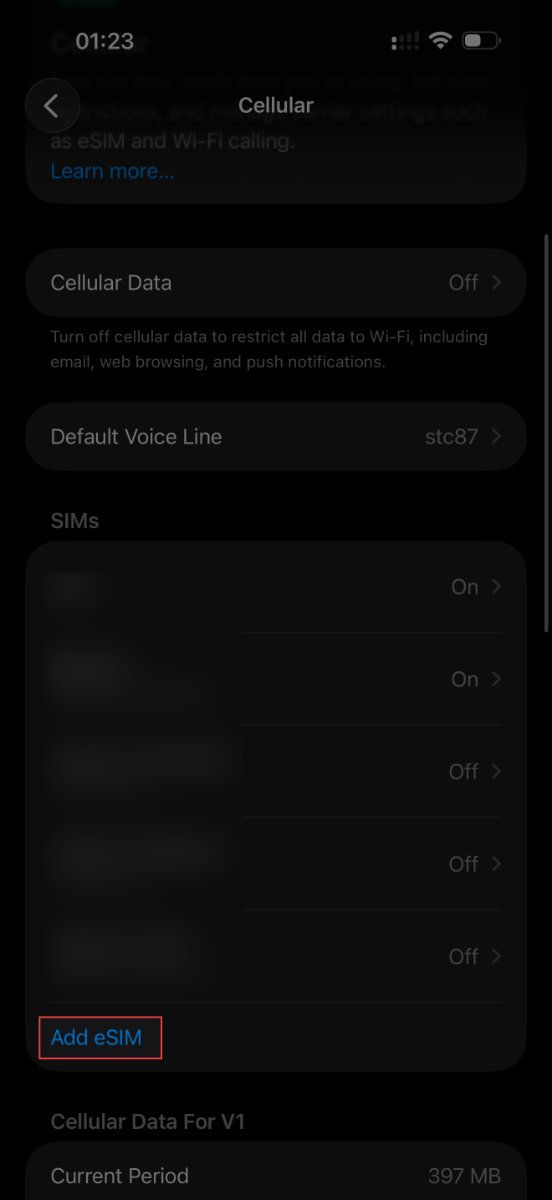
Tap "Add eSIM".
Tap "Use QR Code".
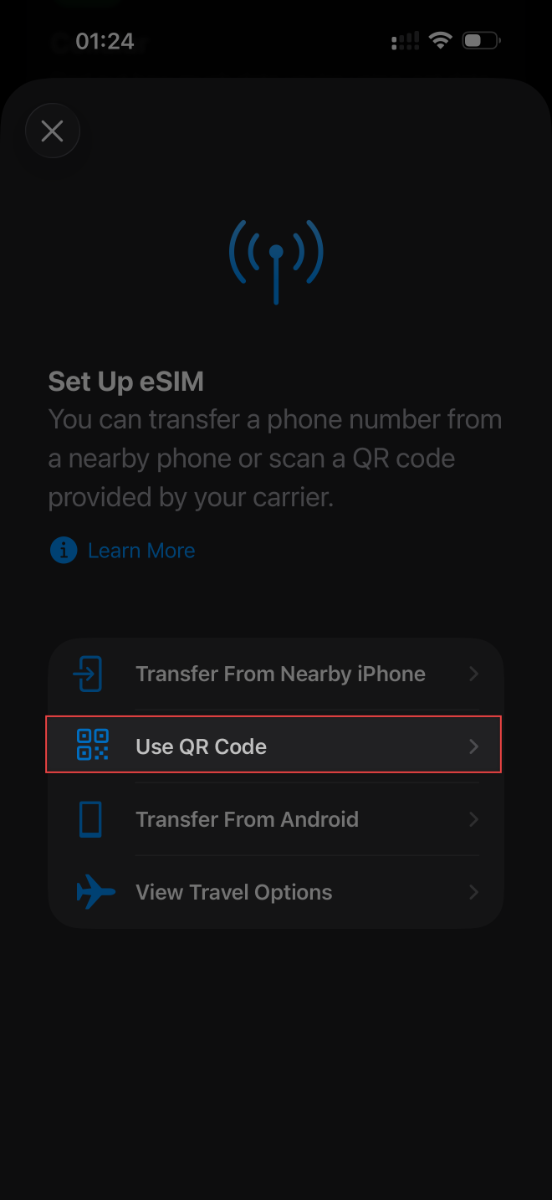
Tap "Scan QR Code".
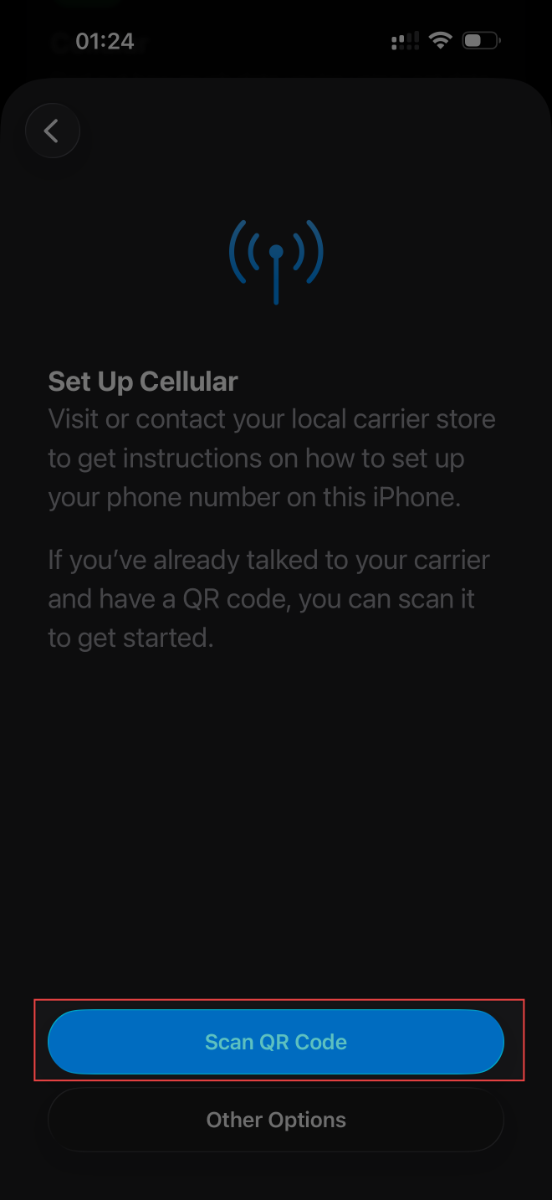
You can now either scan the QR Code directly using the camera on the screen shown below, or tap "Enter Details Manually".
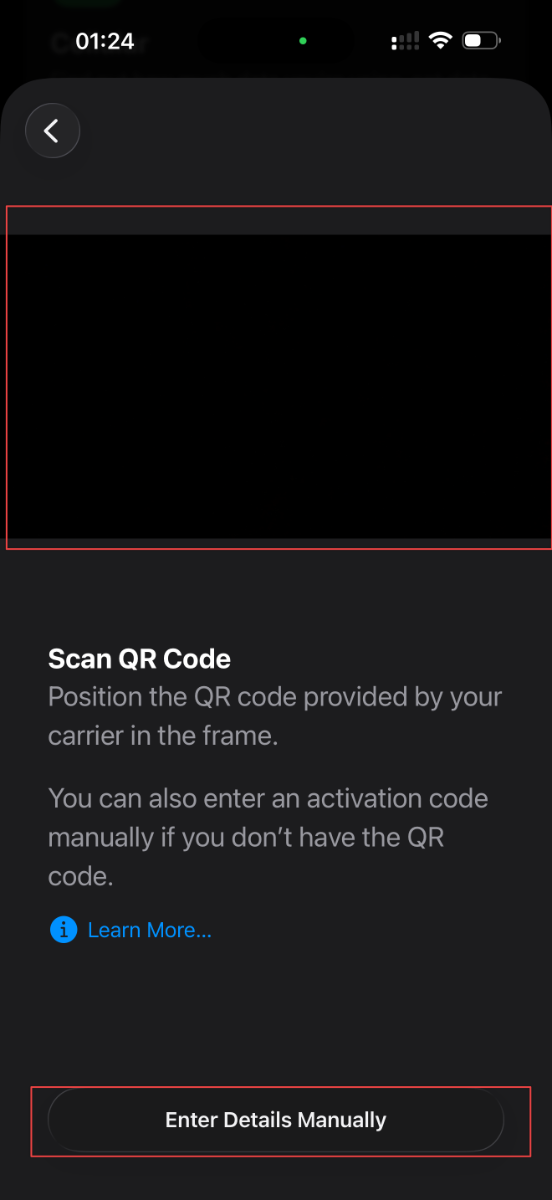
In this article, we will continue using the manual entry method.
Paste the SM-DP+ Address and Activation Code that we explained how to obtain in Part 1, then tap "Next".
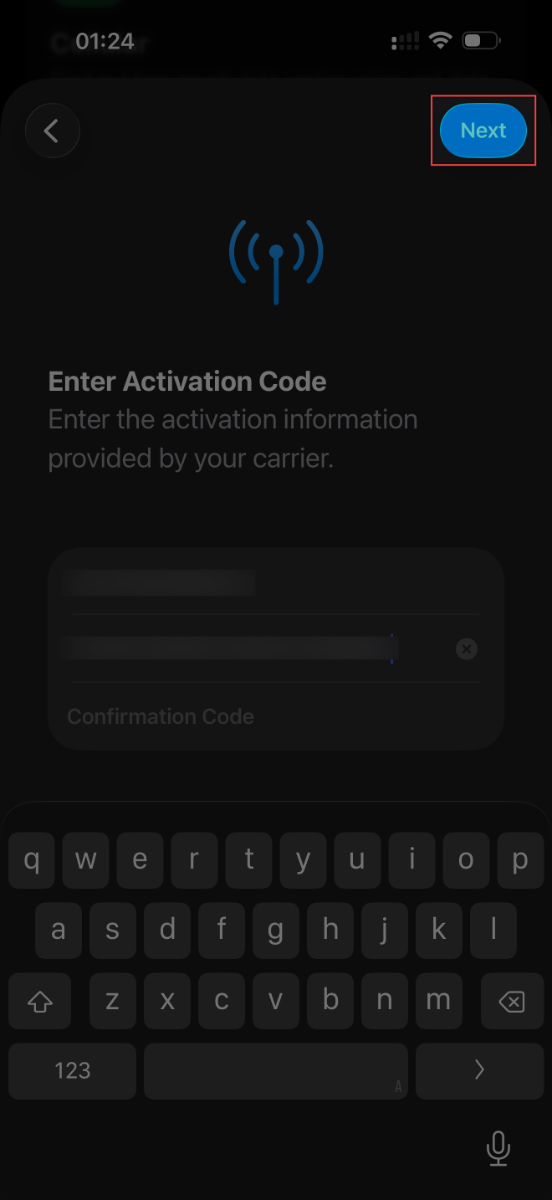
If the eSIM installation details are correct, you will see the "Activate eSIM" screen. Tap "Continue".
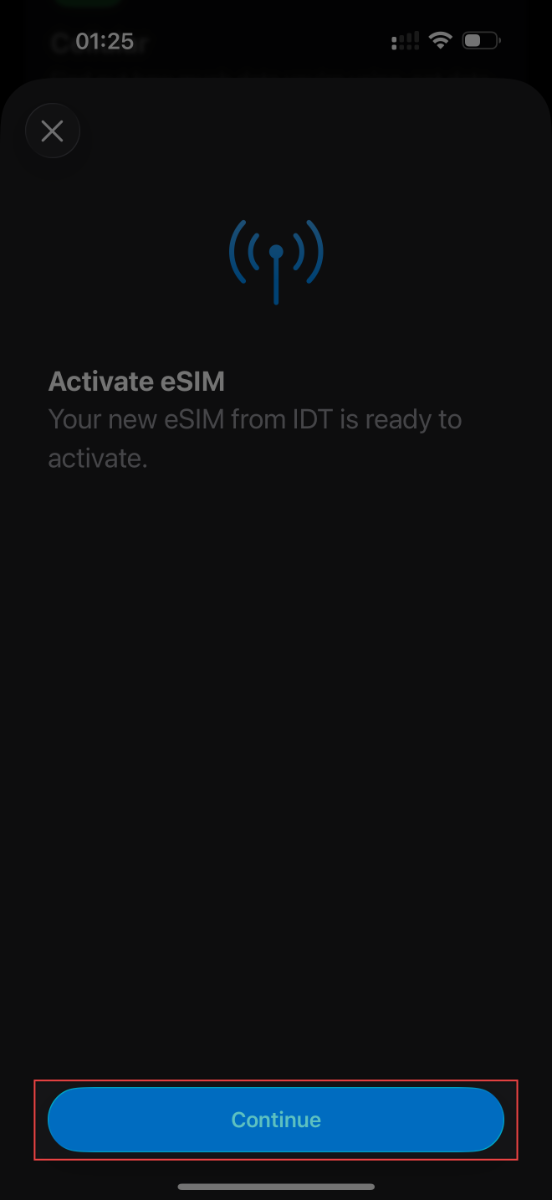
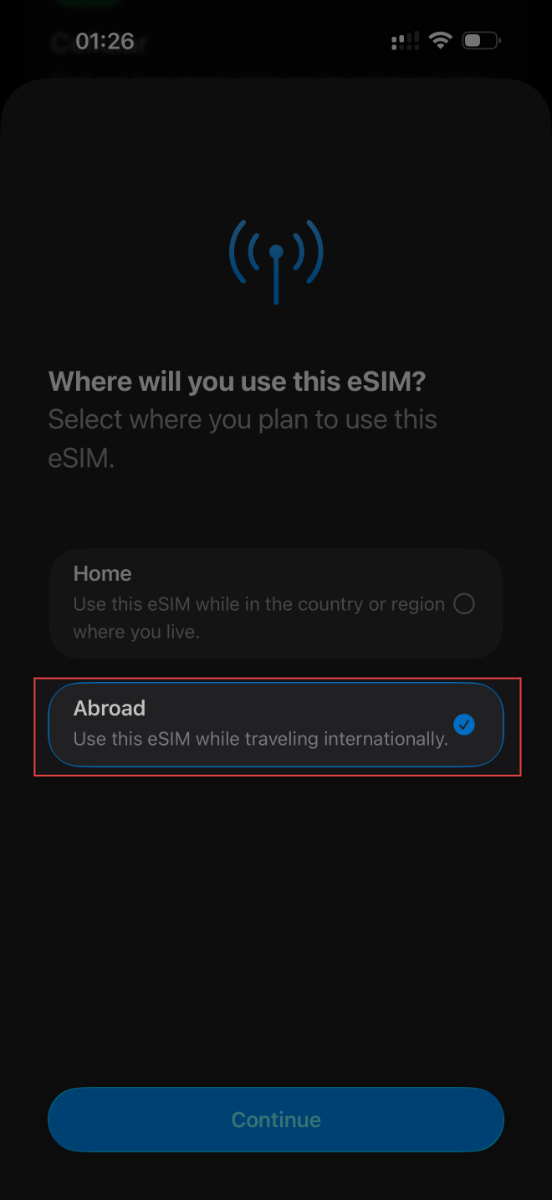
On "Where will you use this eSIM", select "Abroad", then tap "Continue".
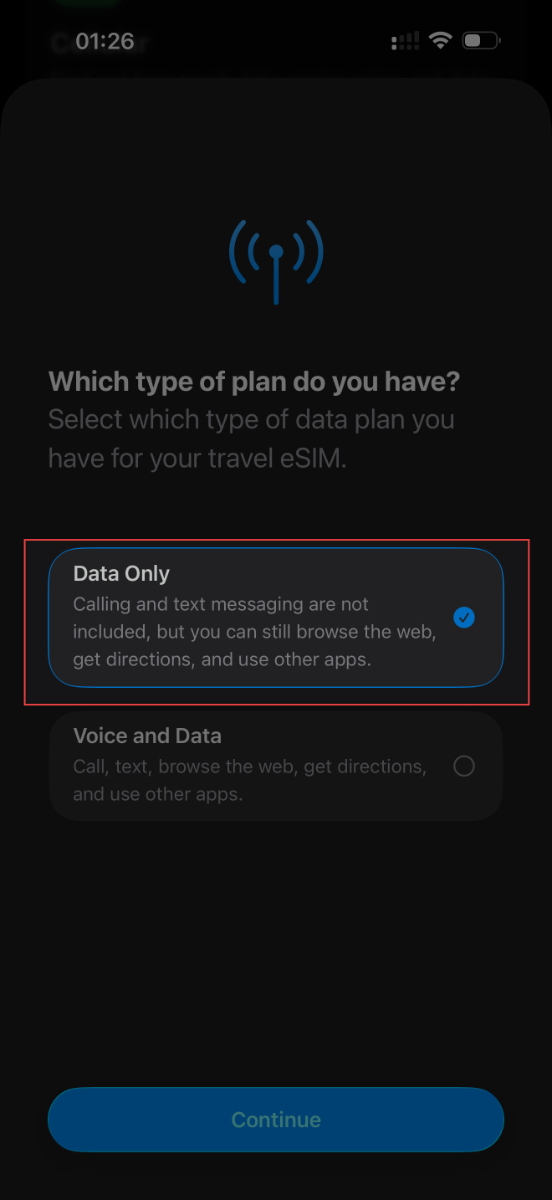
On "Which type of plan do you have?", select "Data Only", then tap "Continue".
Once the installation is successful, you will see the "Travel eSIM Setup Complete" screen.
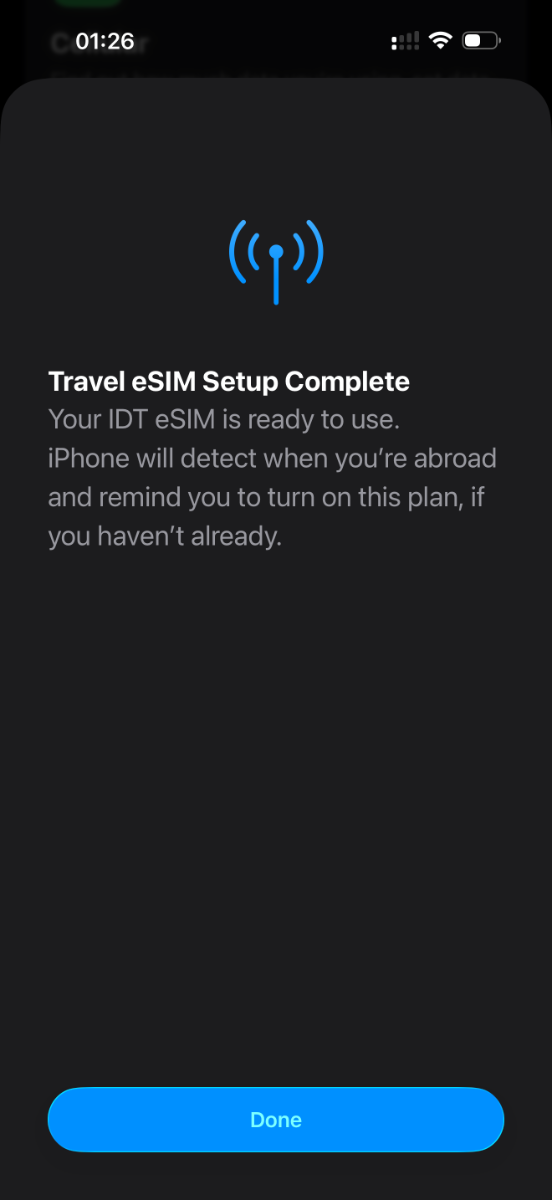
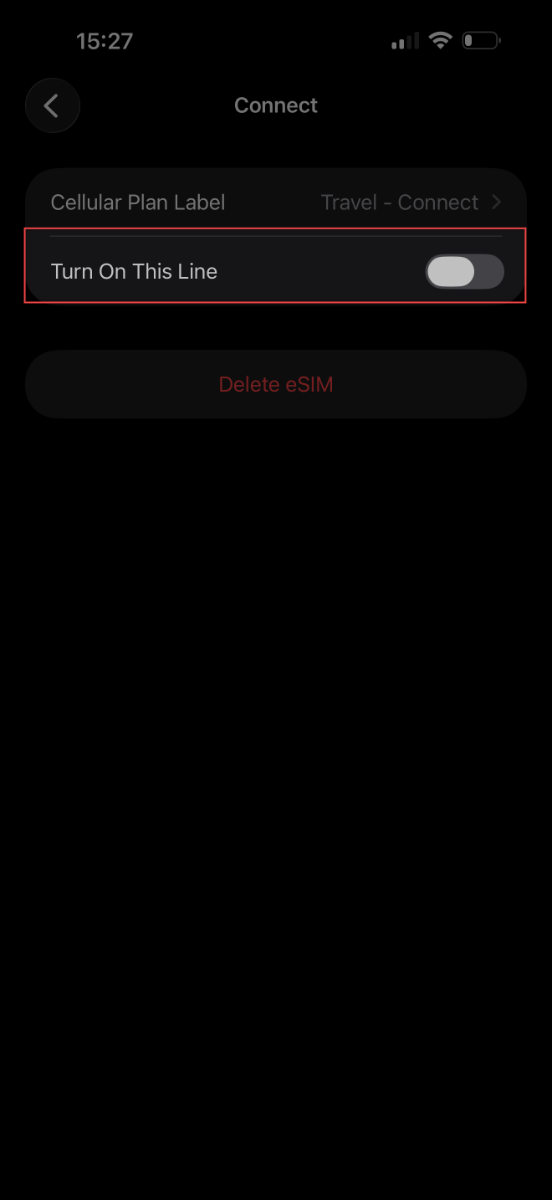
After installation, the eSIM will be turned off by default. You will need to turn it on, enable data roaming, and select it for Cellular Data to make sure your internet works as soon as you arrive at your destination. Please follow Part 3 to complete the setup.
Part 3: Turn On Data Roaming and Select the New eSIM for Cellular Data
On the Cellular screen, tap your new eSIM.
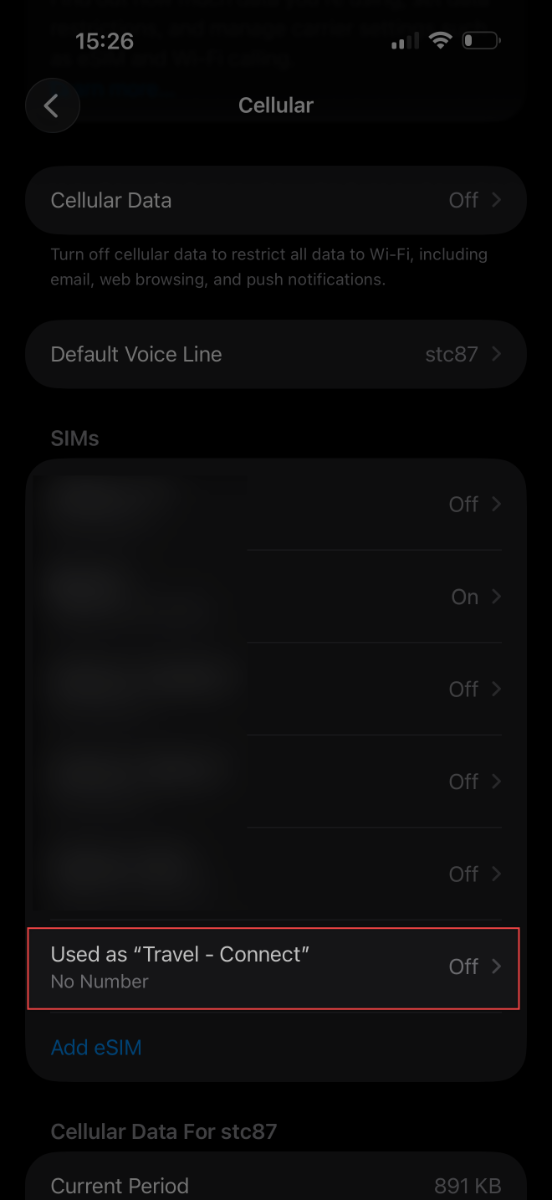
Turn on your new eSIM.
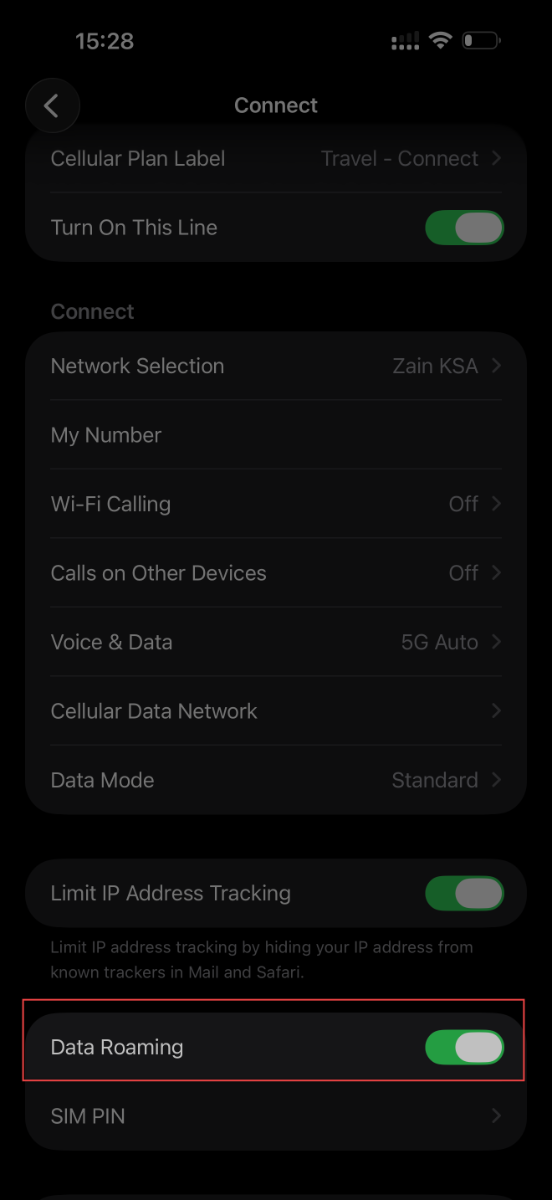
After turning on the eSIM, several options will appear, including "Data Roaming". Please turn it on.
Tap the back button at the top of the screen to go back, then tap "Cellular Data".
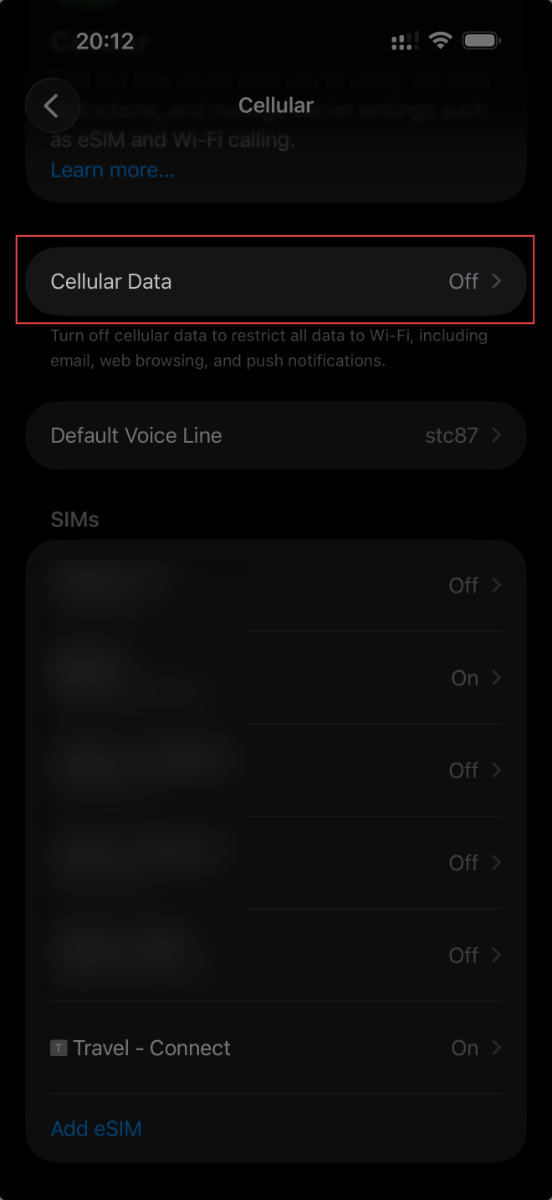
Select your new DataFly eSIM.
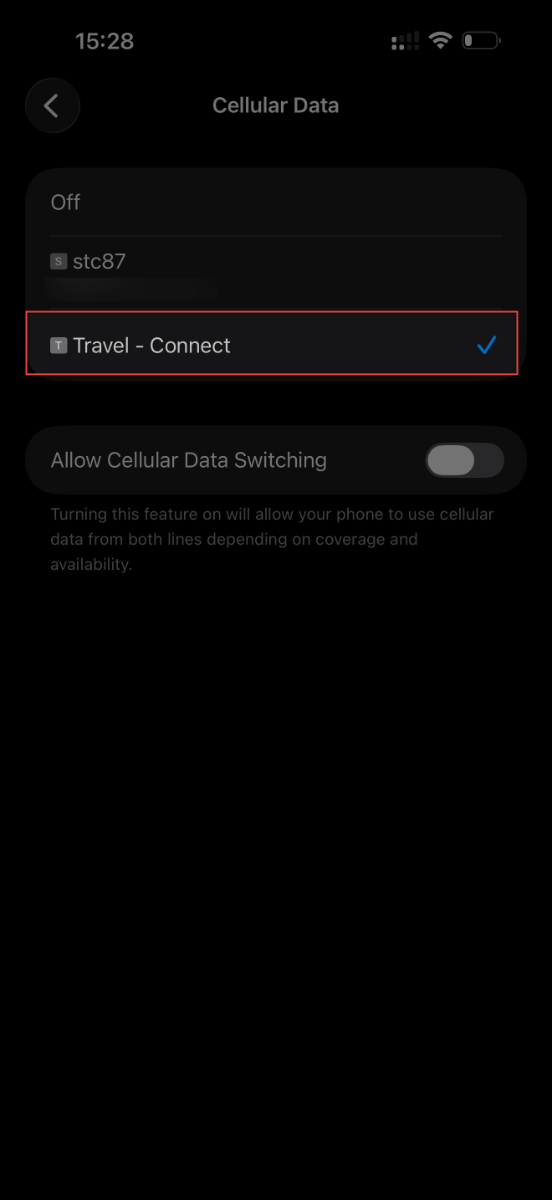
Once these steps are completed, everything will be ready, and your internet should work automatically as soon as you arrive in your destination country ✈️
We wish you a smooth setup and a wonderful trip.