
Use this guide if you prefer to install your eSIM manually on a Samsung phone instead of using Quick Install. It also includes the recommended setup steps to help your eSIM work smoothly when you travel.
Before you start
Internet connection: Make sure your phone is connected to stable Wi-Fi or mobile data during installation.
Device lock: Confirm your phone is unlocked (not restricted to one carrier).
Have your eSIM ready: You will need either a QR code or an Activation Code from the DataFly app.
Internet connection: Make sure your phone is connected to stable Wi-Fi or mobile data during installation.
Device lock: Confirm your phone is unlocked (not restricted to one carrier).
Have your eSIM ready: You will need either a QR code or an Activation Code from the DataFly app.
Part 1: Get your QR code or Activation Code from DataFly
If you don't have the QR code or the activation code yet, you can find them in the DataFly app:
Open the DataFly app.
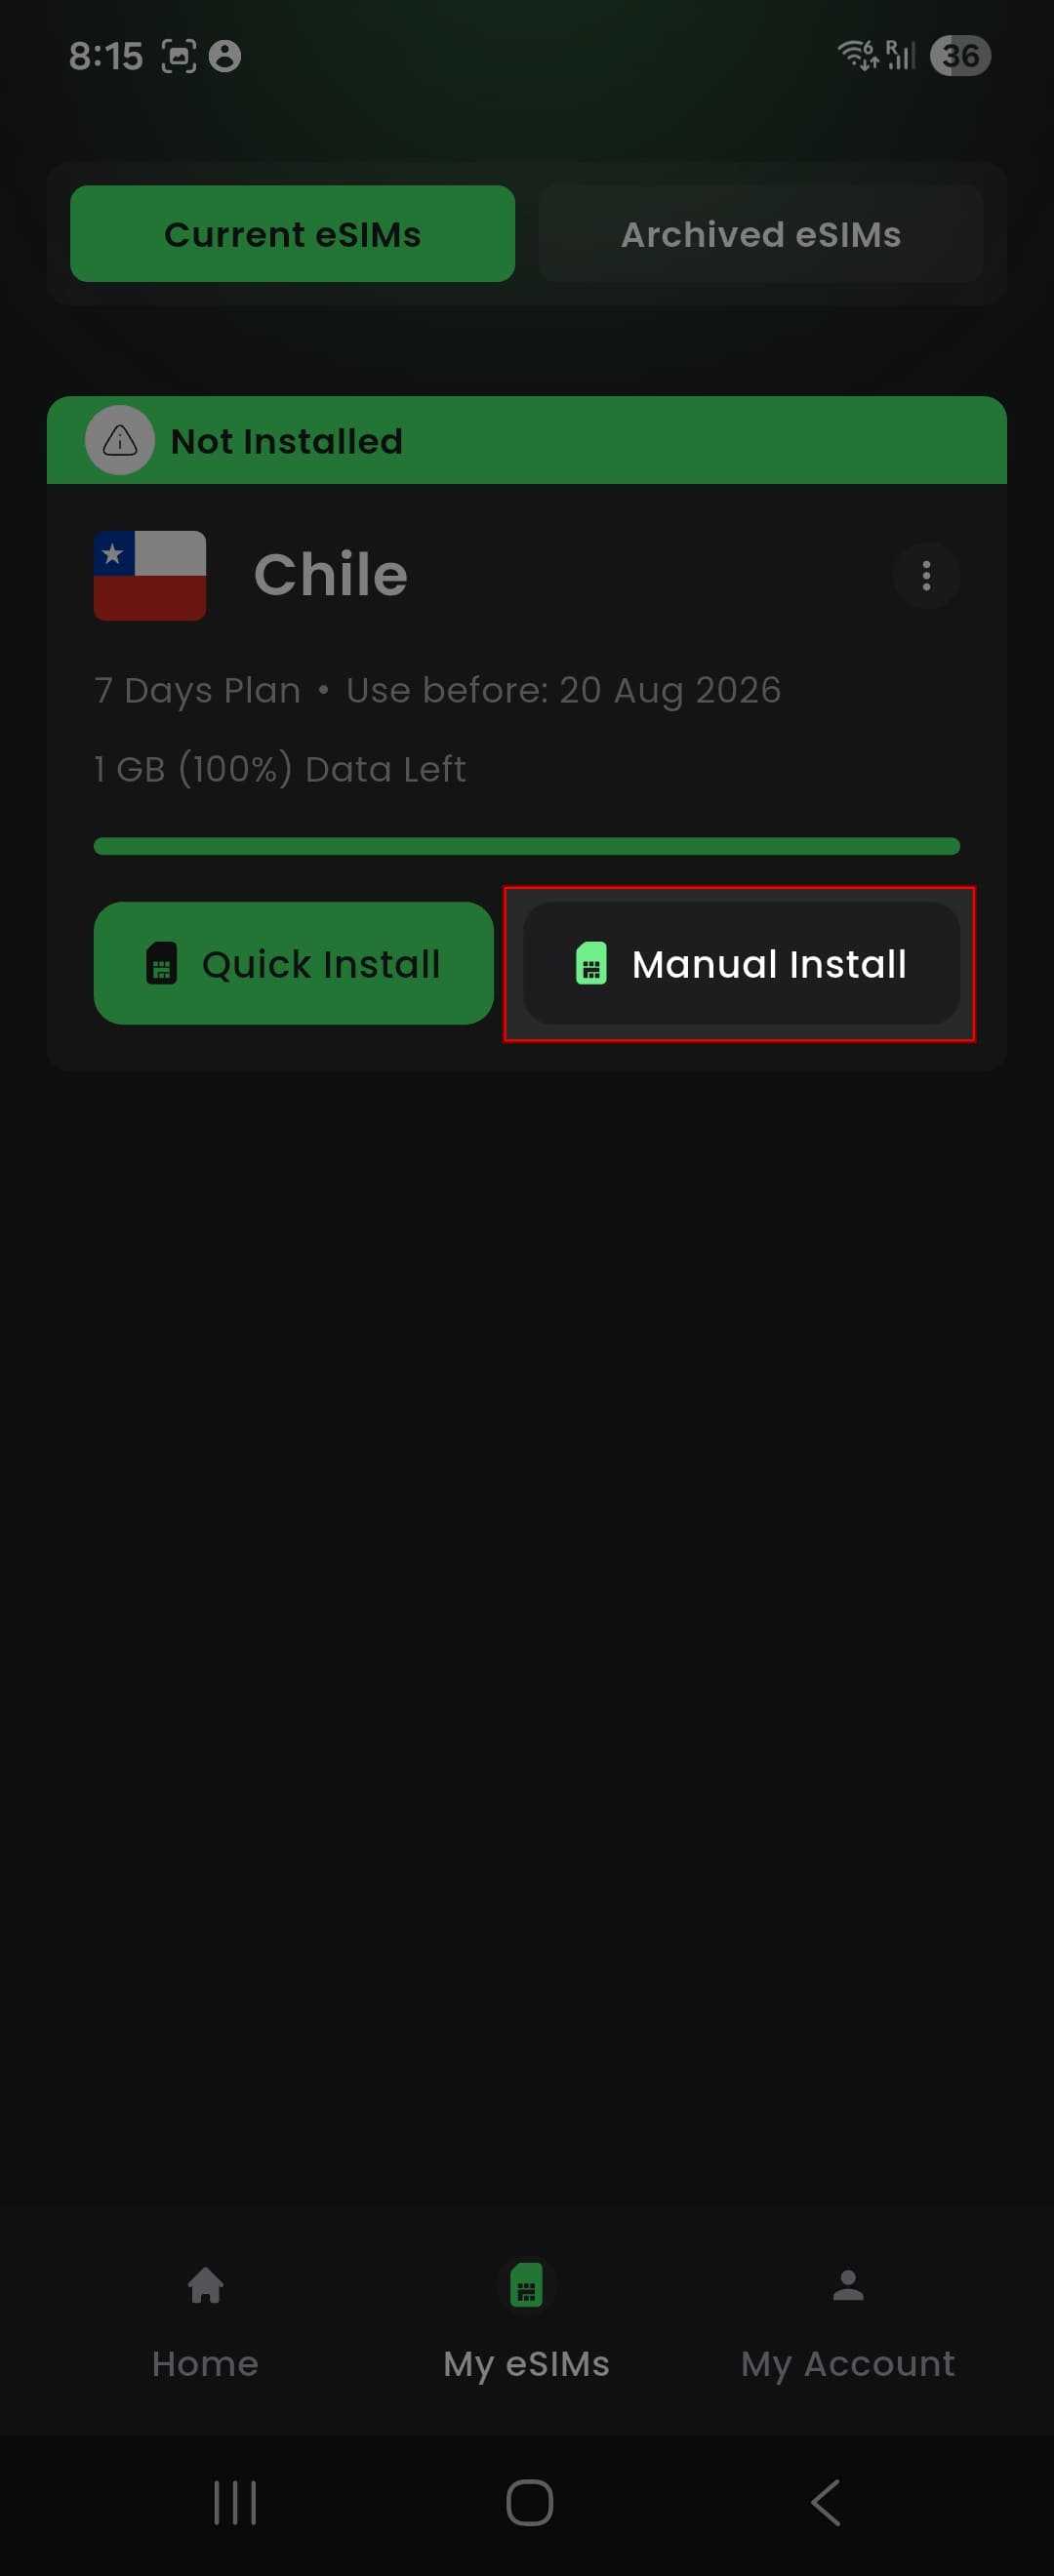
Tap My eSIMs.
On the eSIM you want to install, tap Manual Install.
Tap Copy to copy the activation code, or tap Share to save or share the QR code.
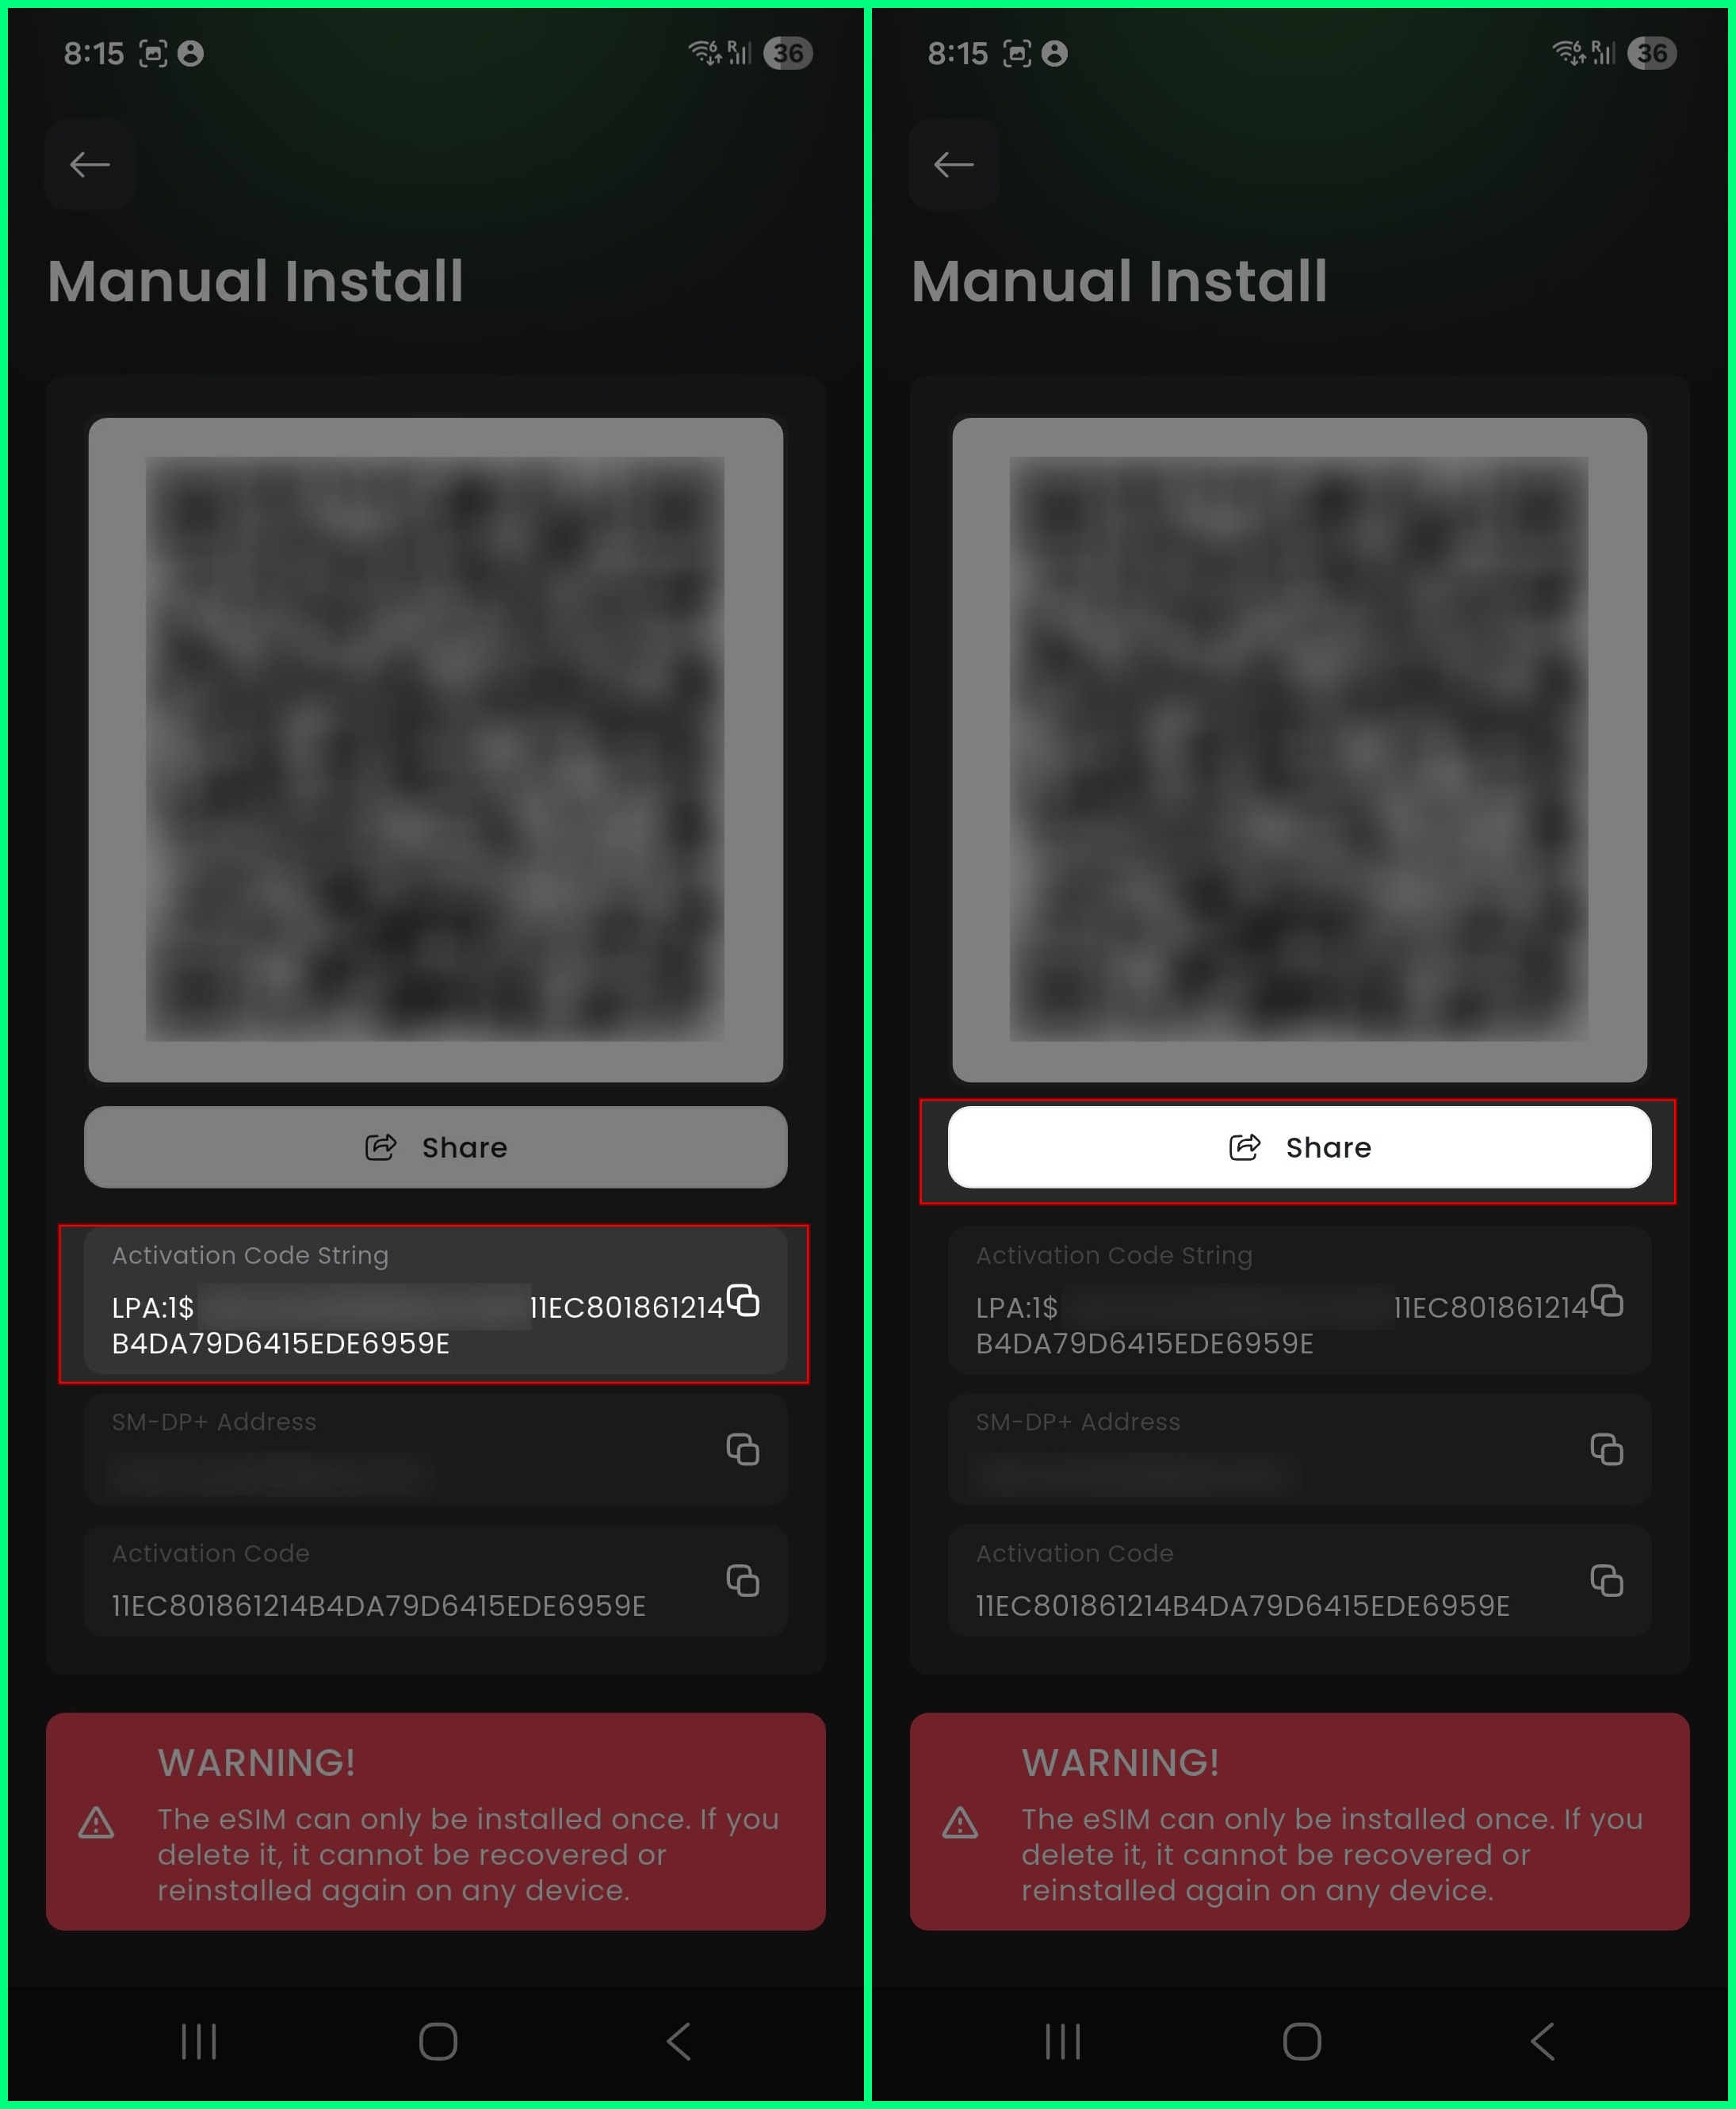
After copying the activation code or saving the QR code, continue to Part 2 to install your eSIM.
Part 2: Install the eSIM manually
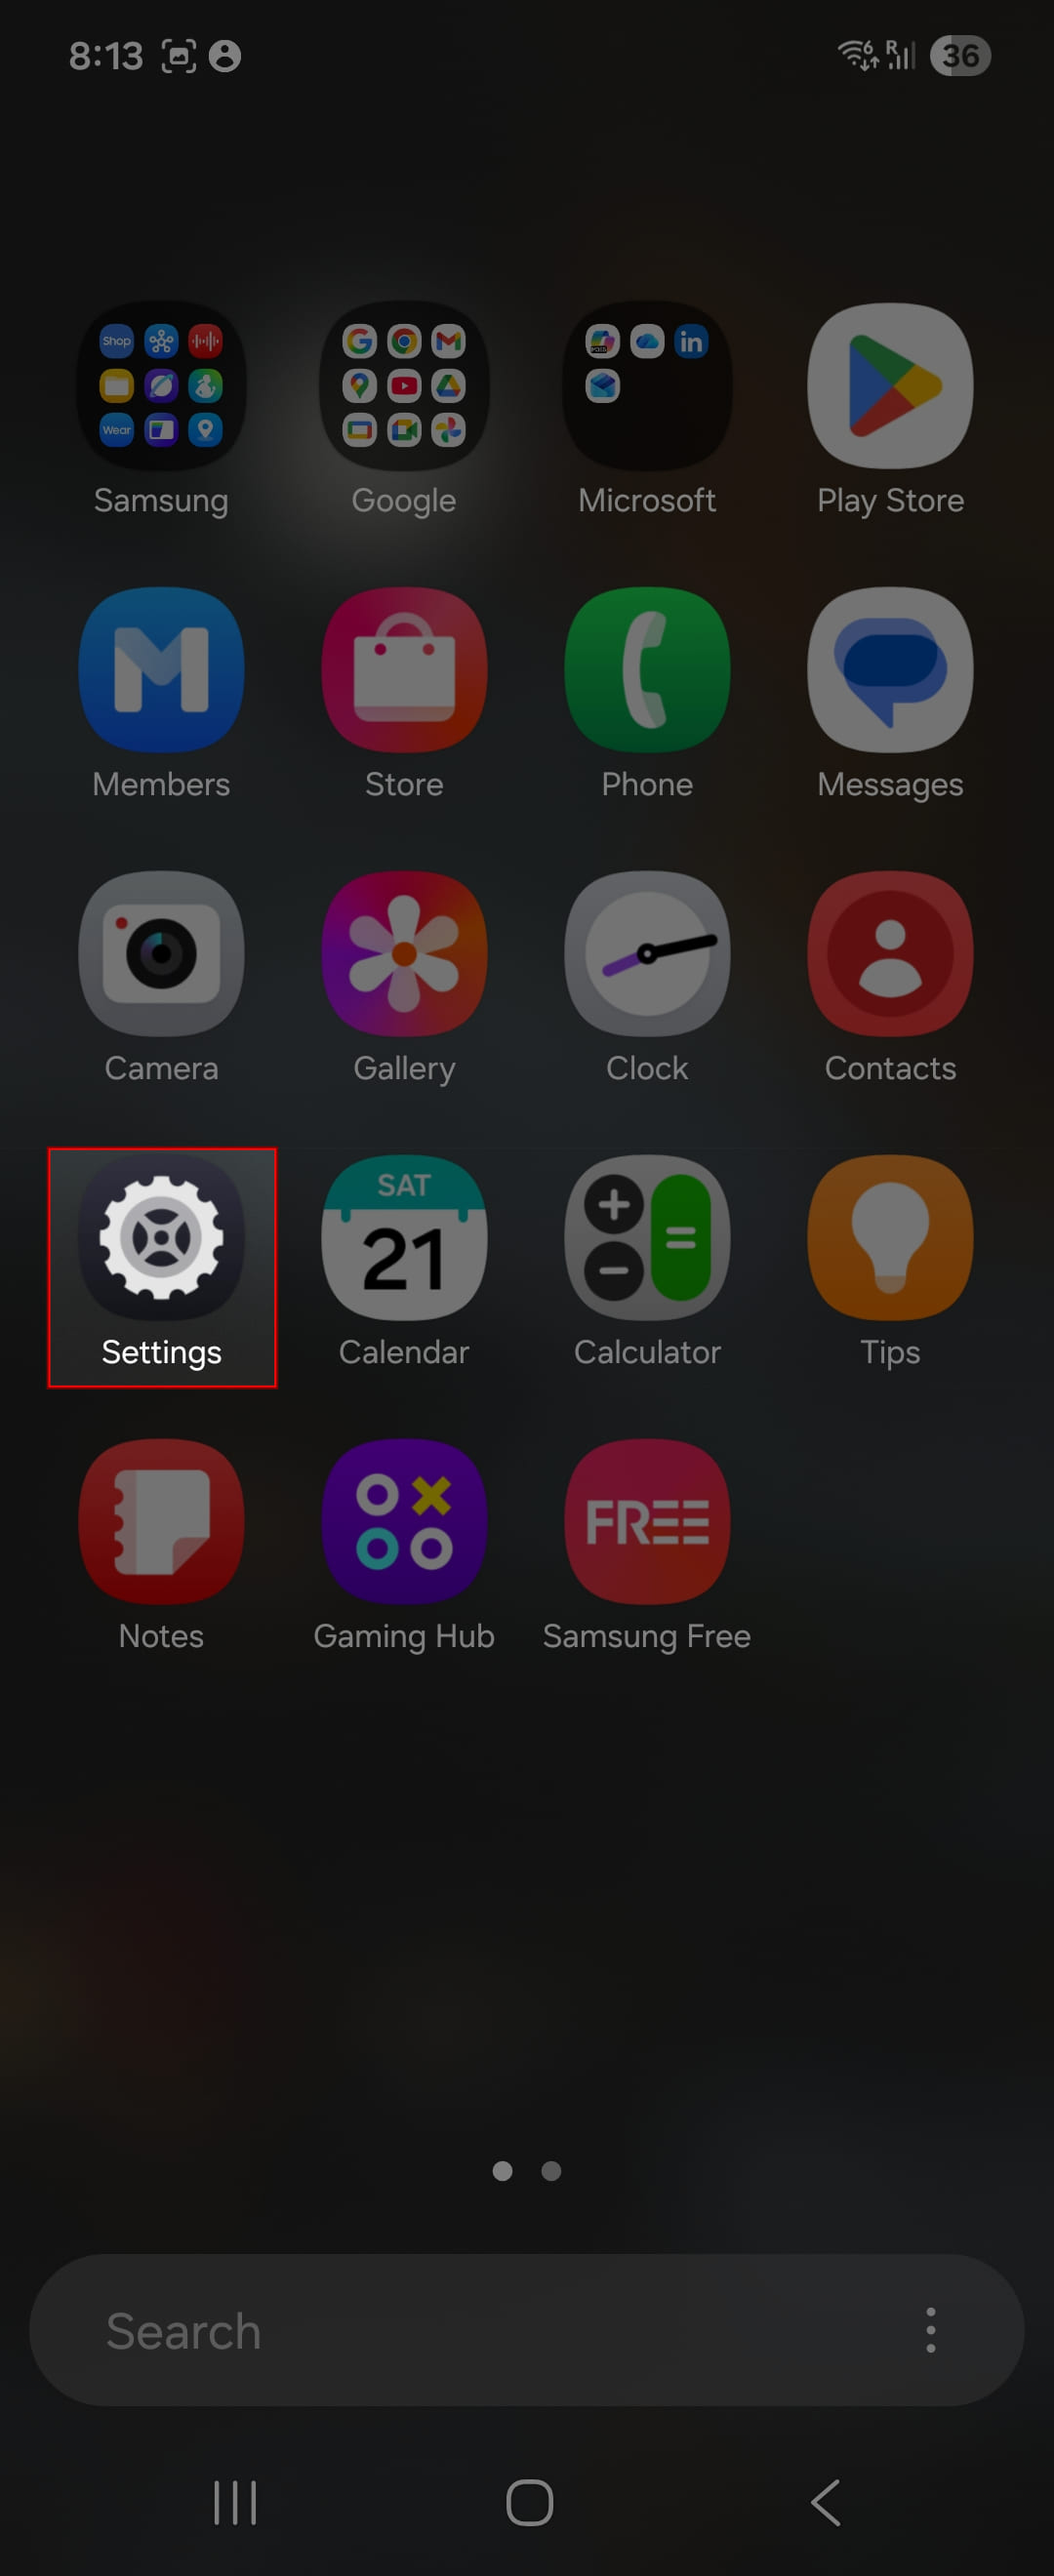
Open Settings.
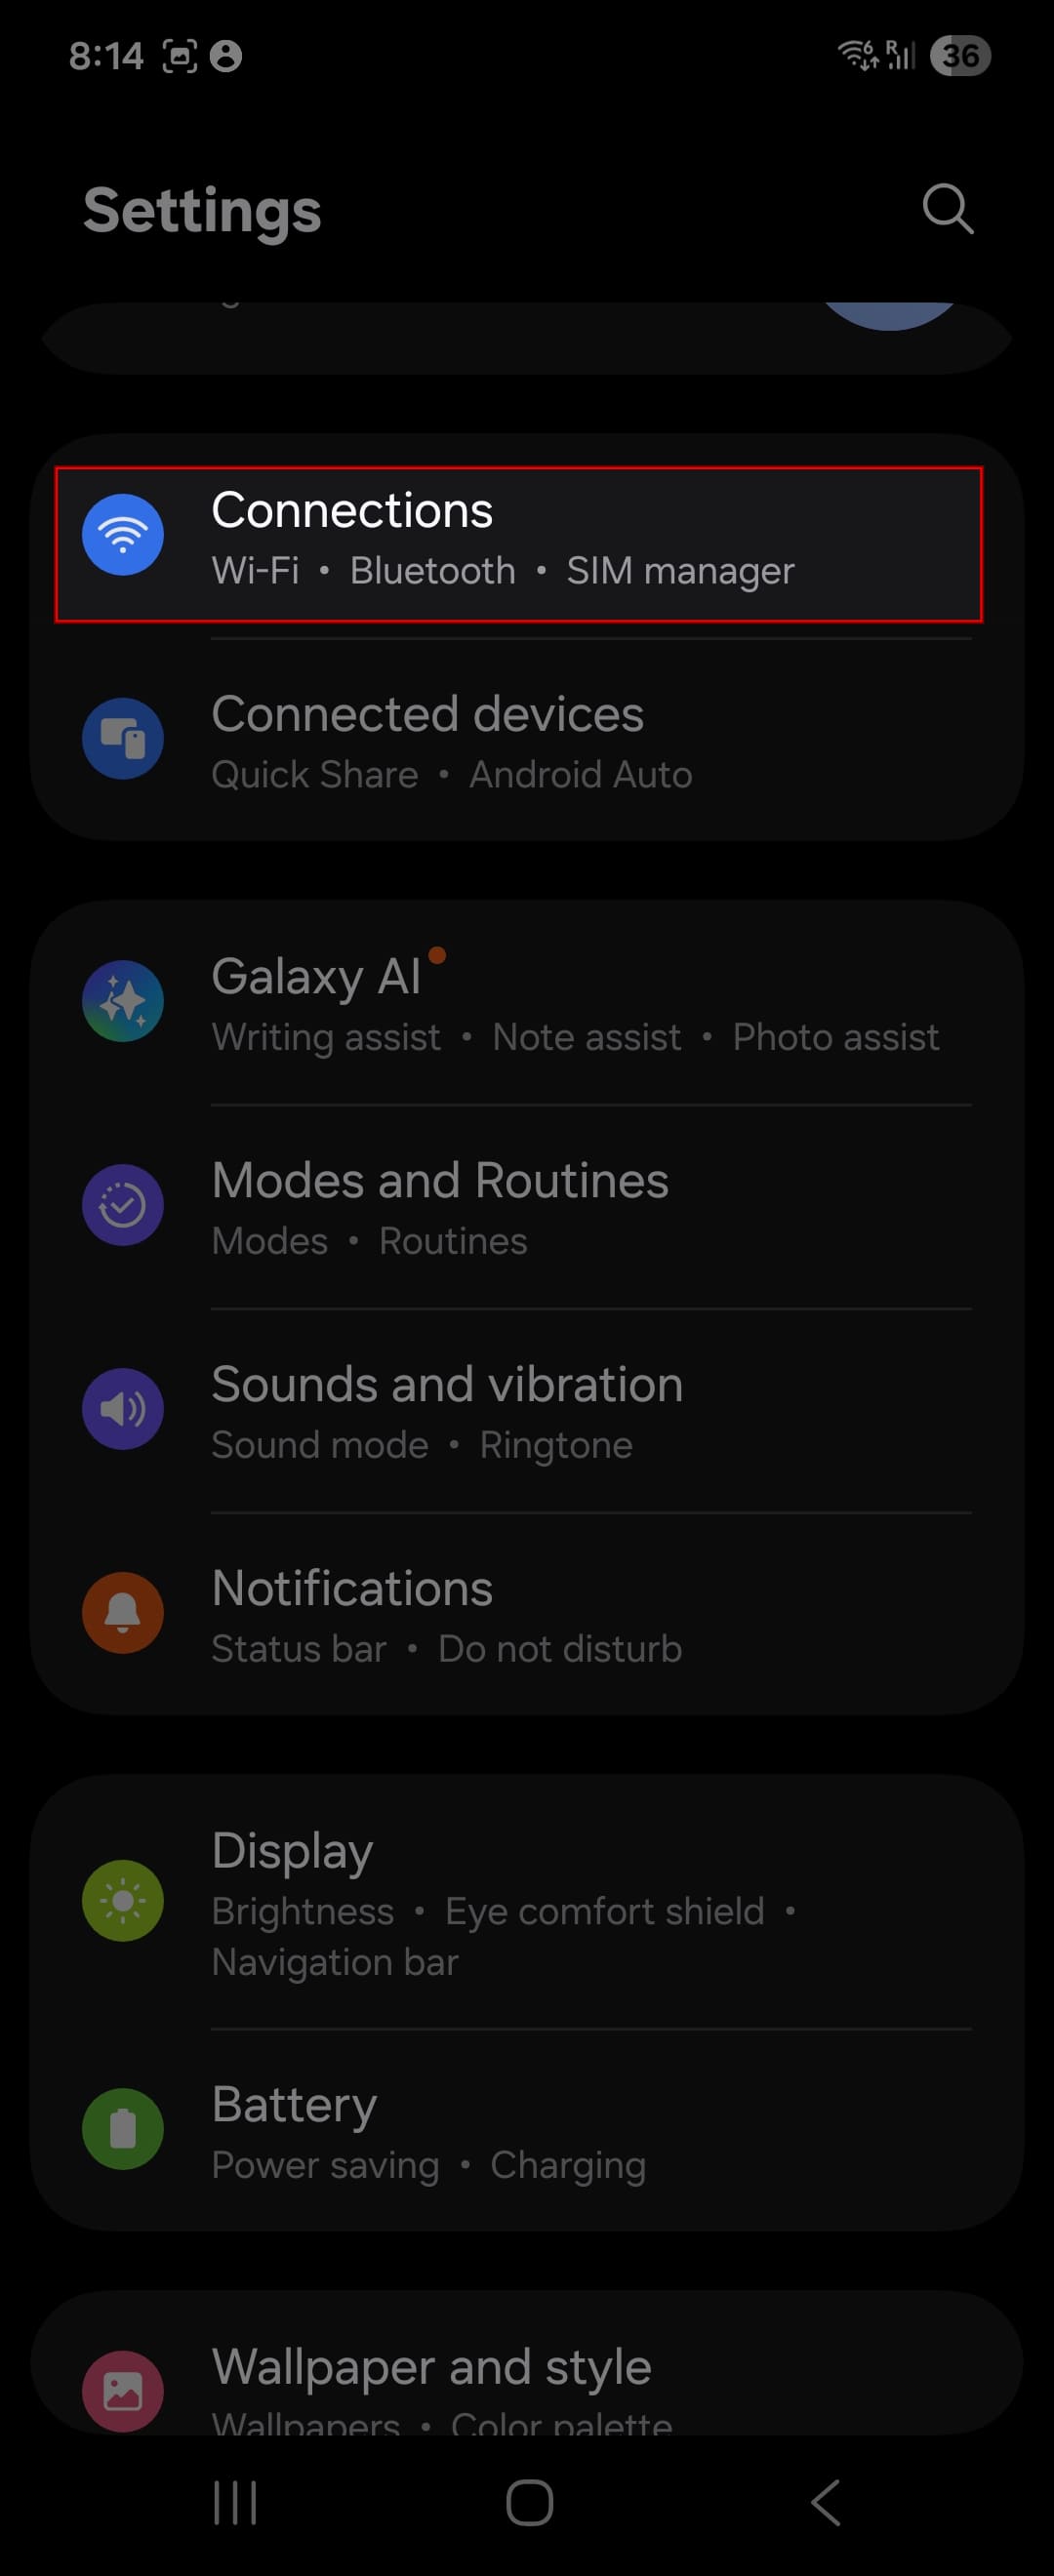
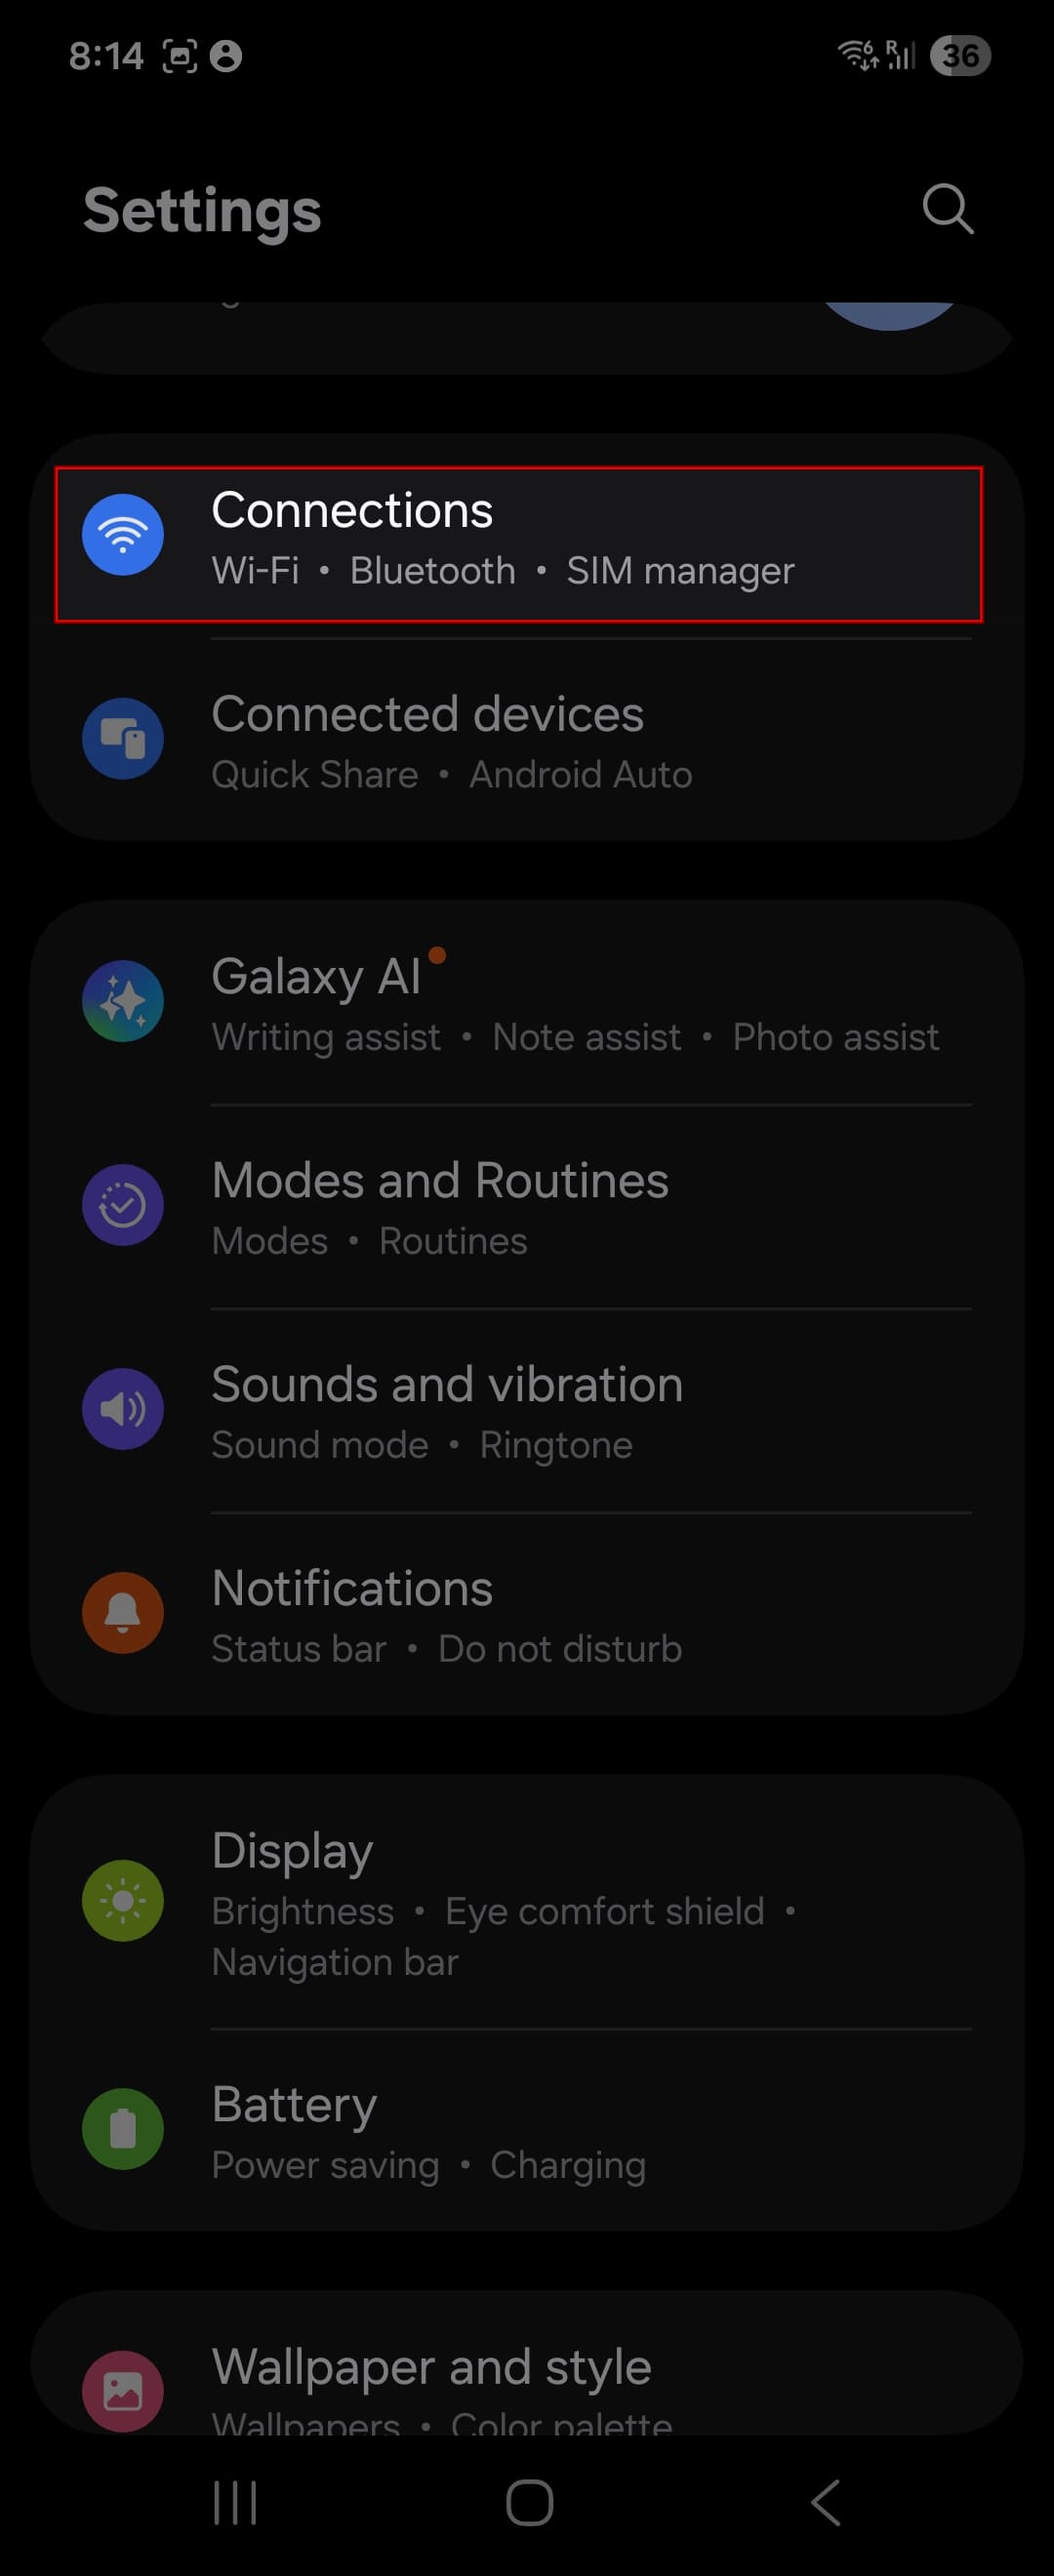
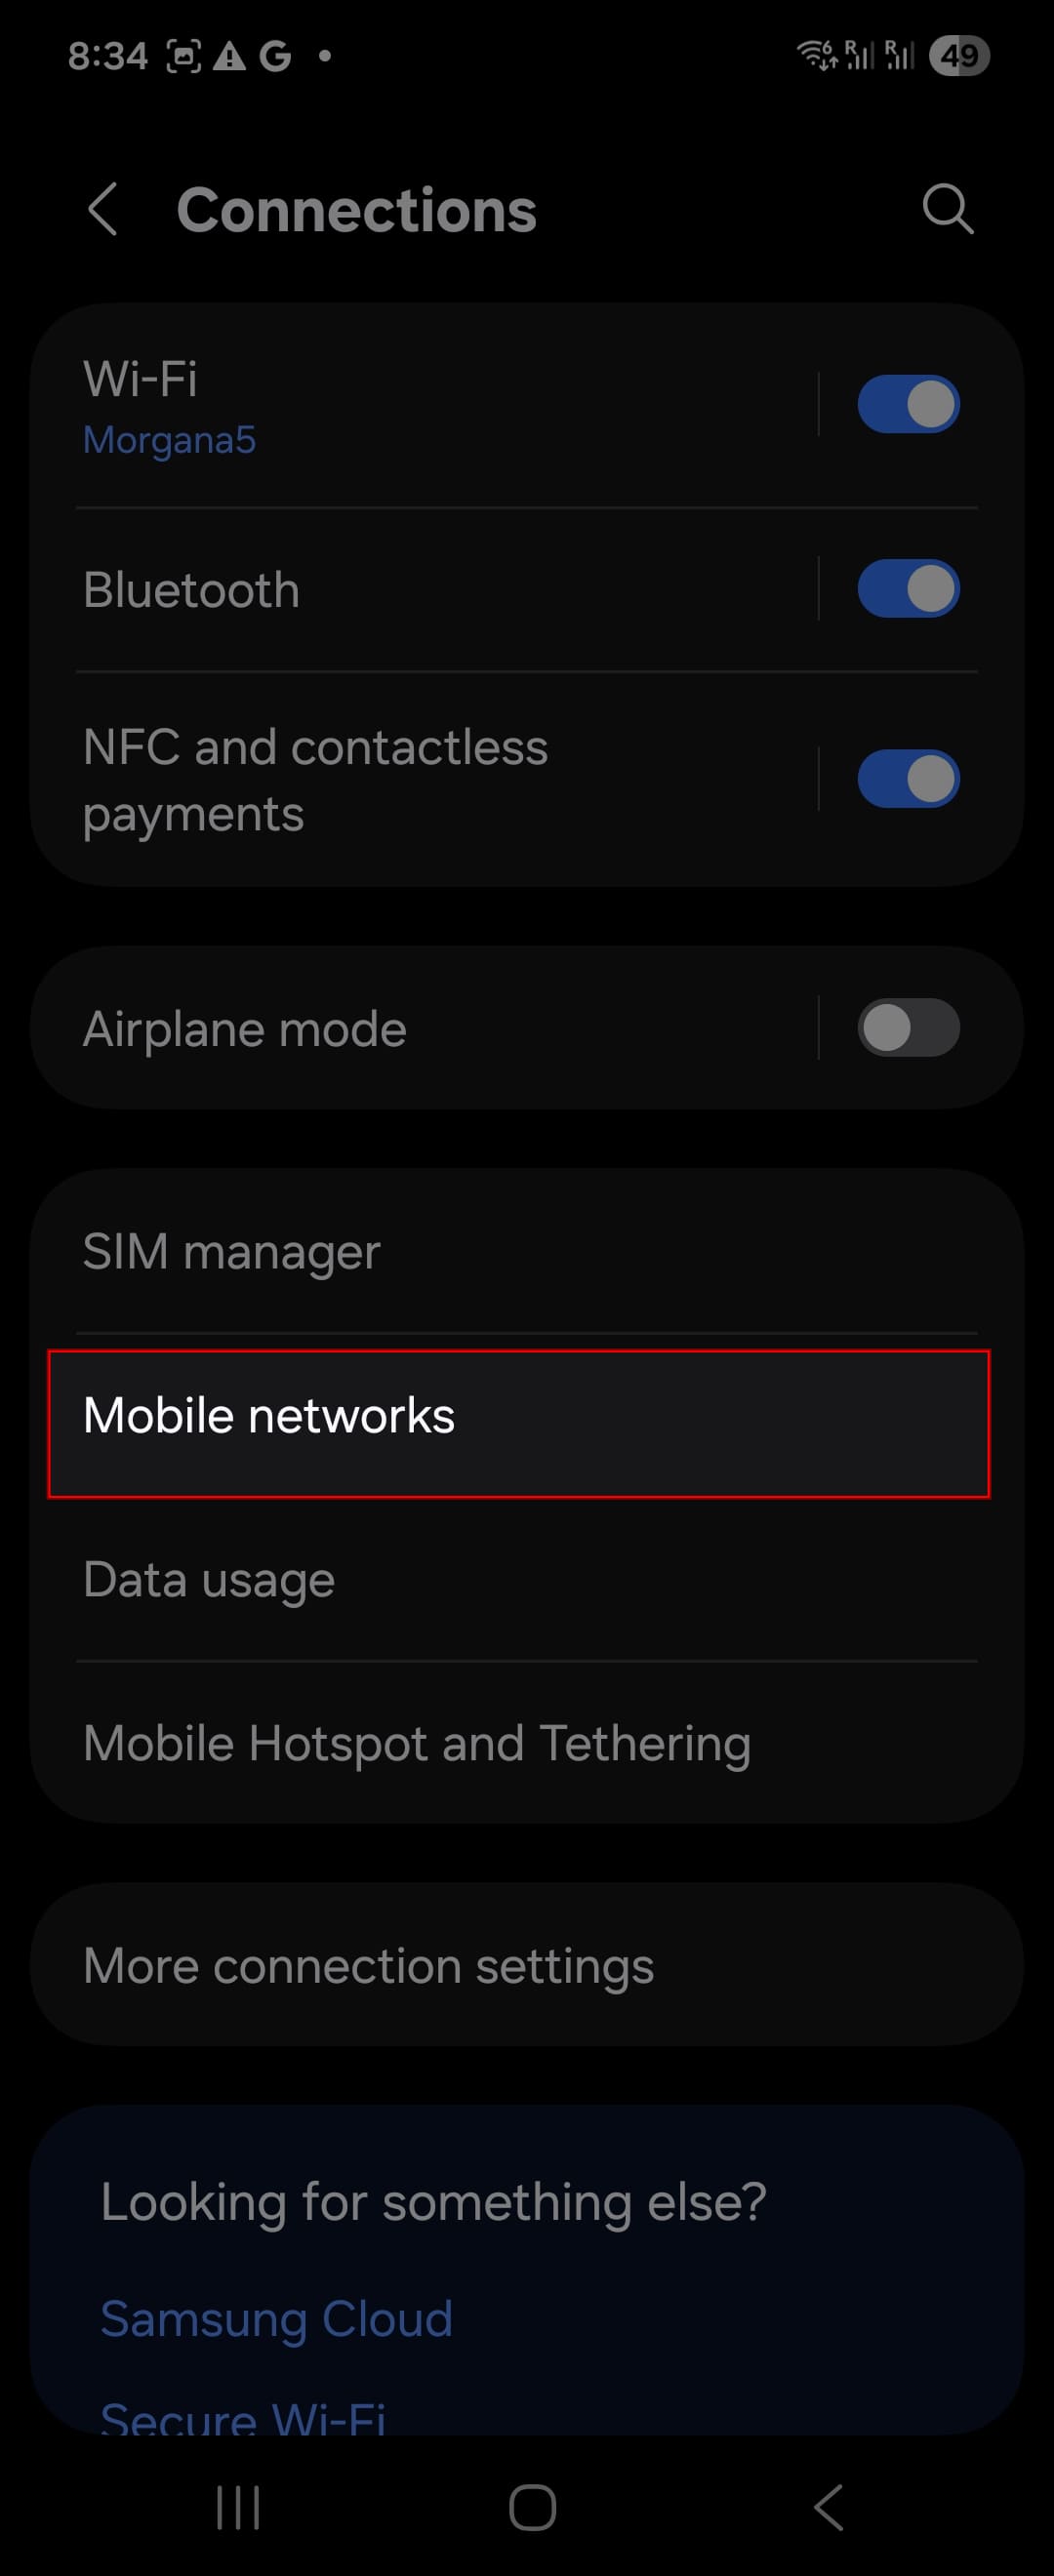
Tap Connections.
Tap SIM manager.
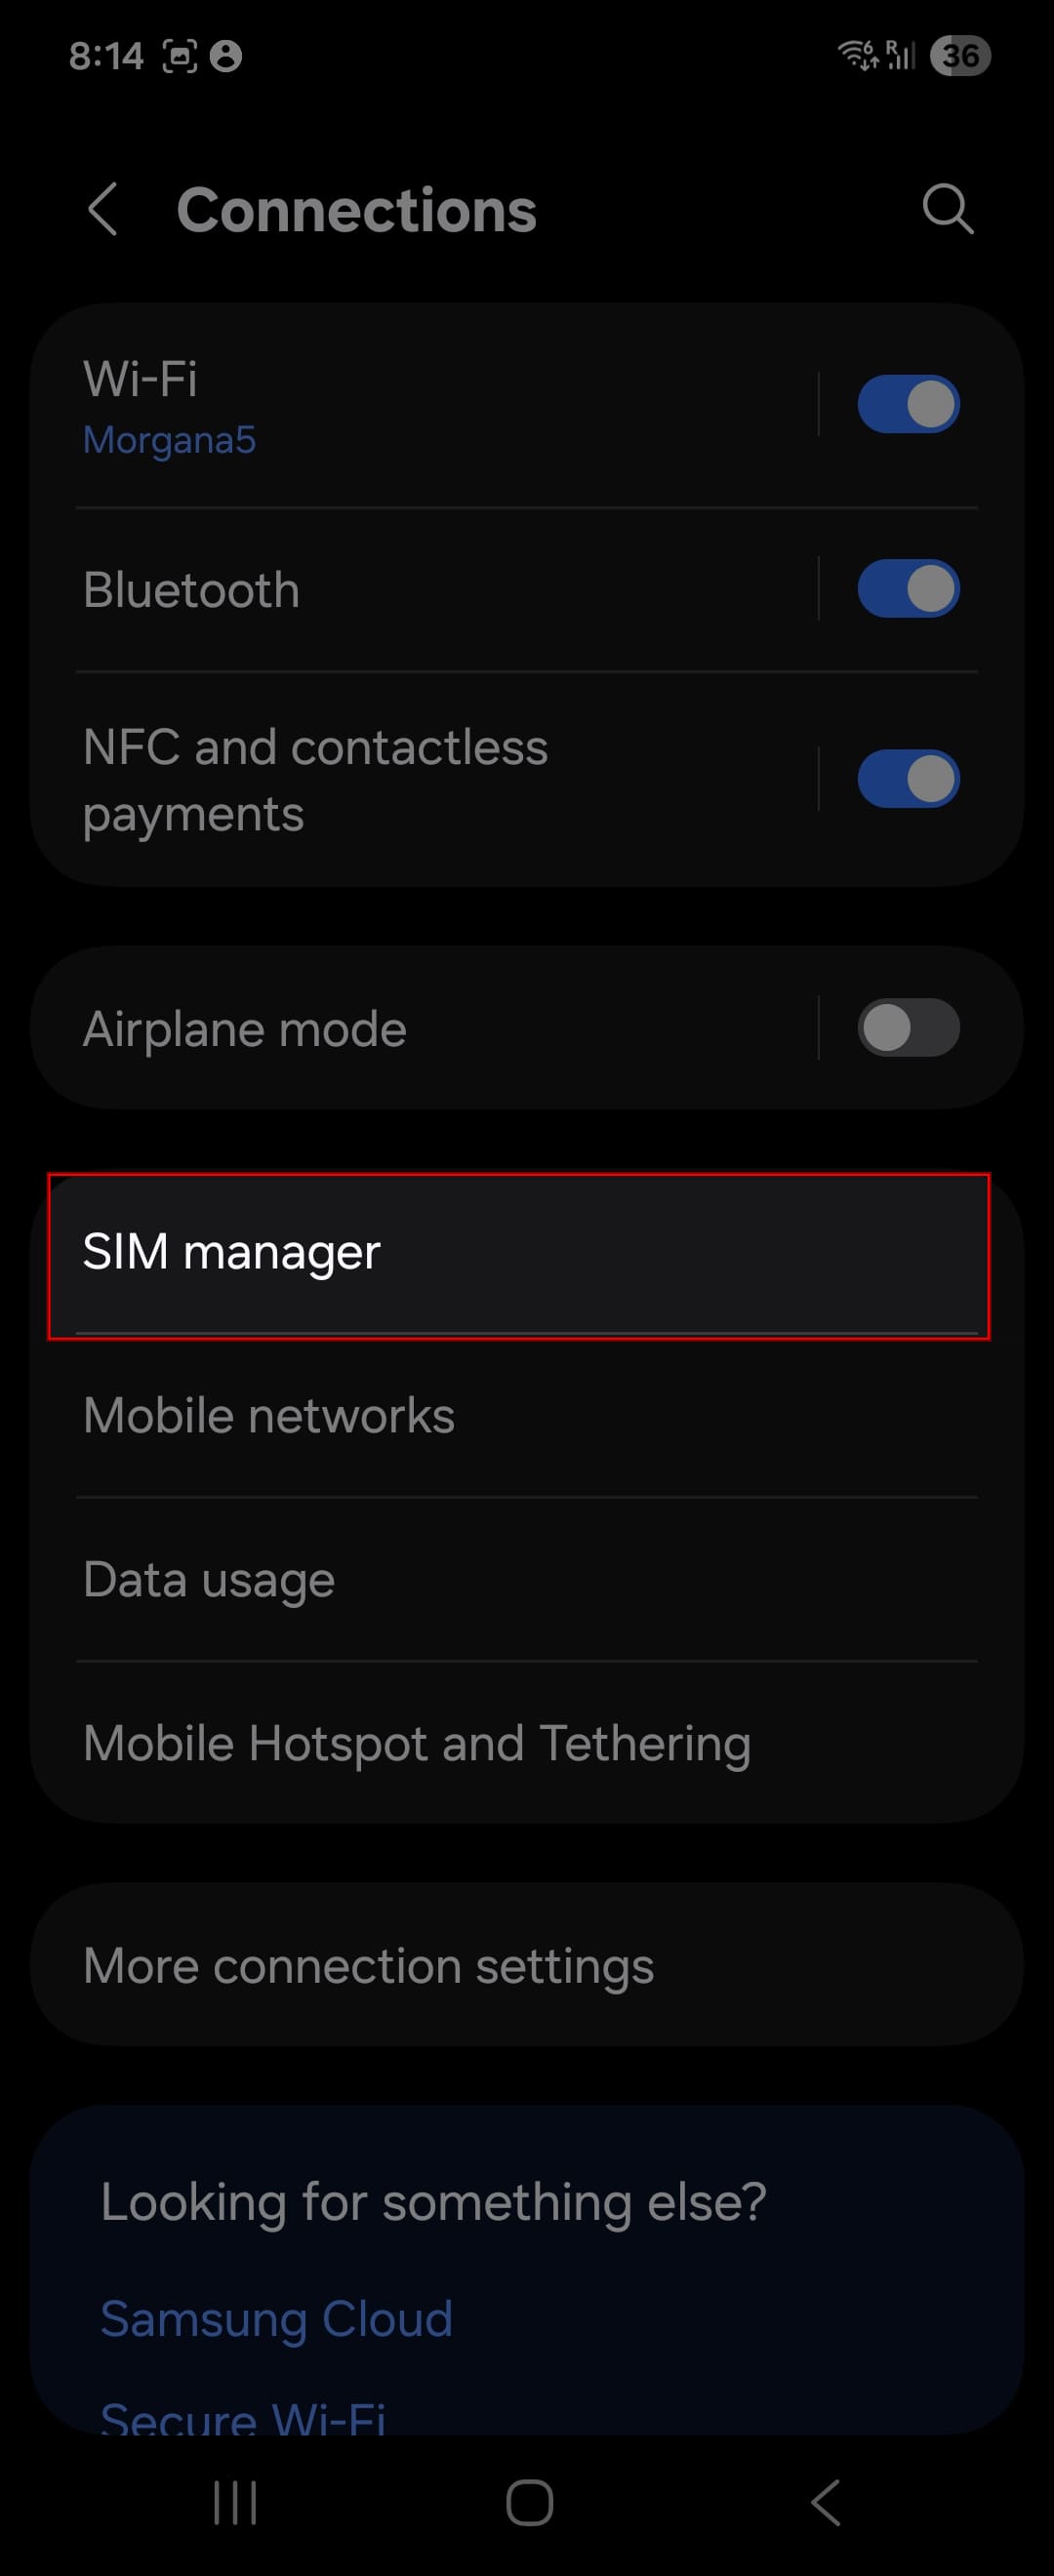
Tap Add eSIM.
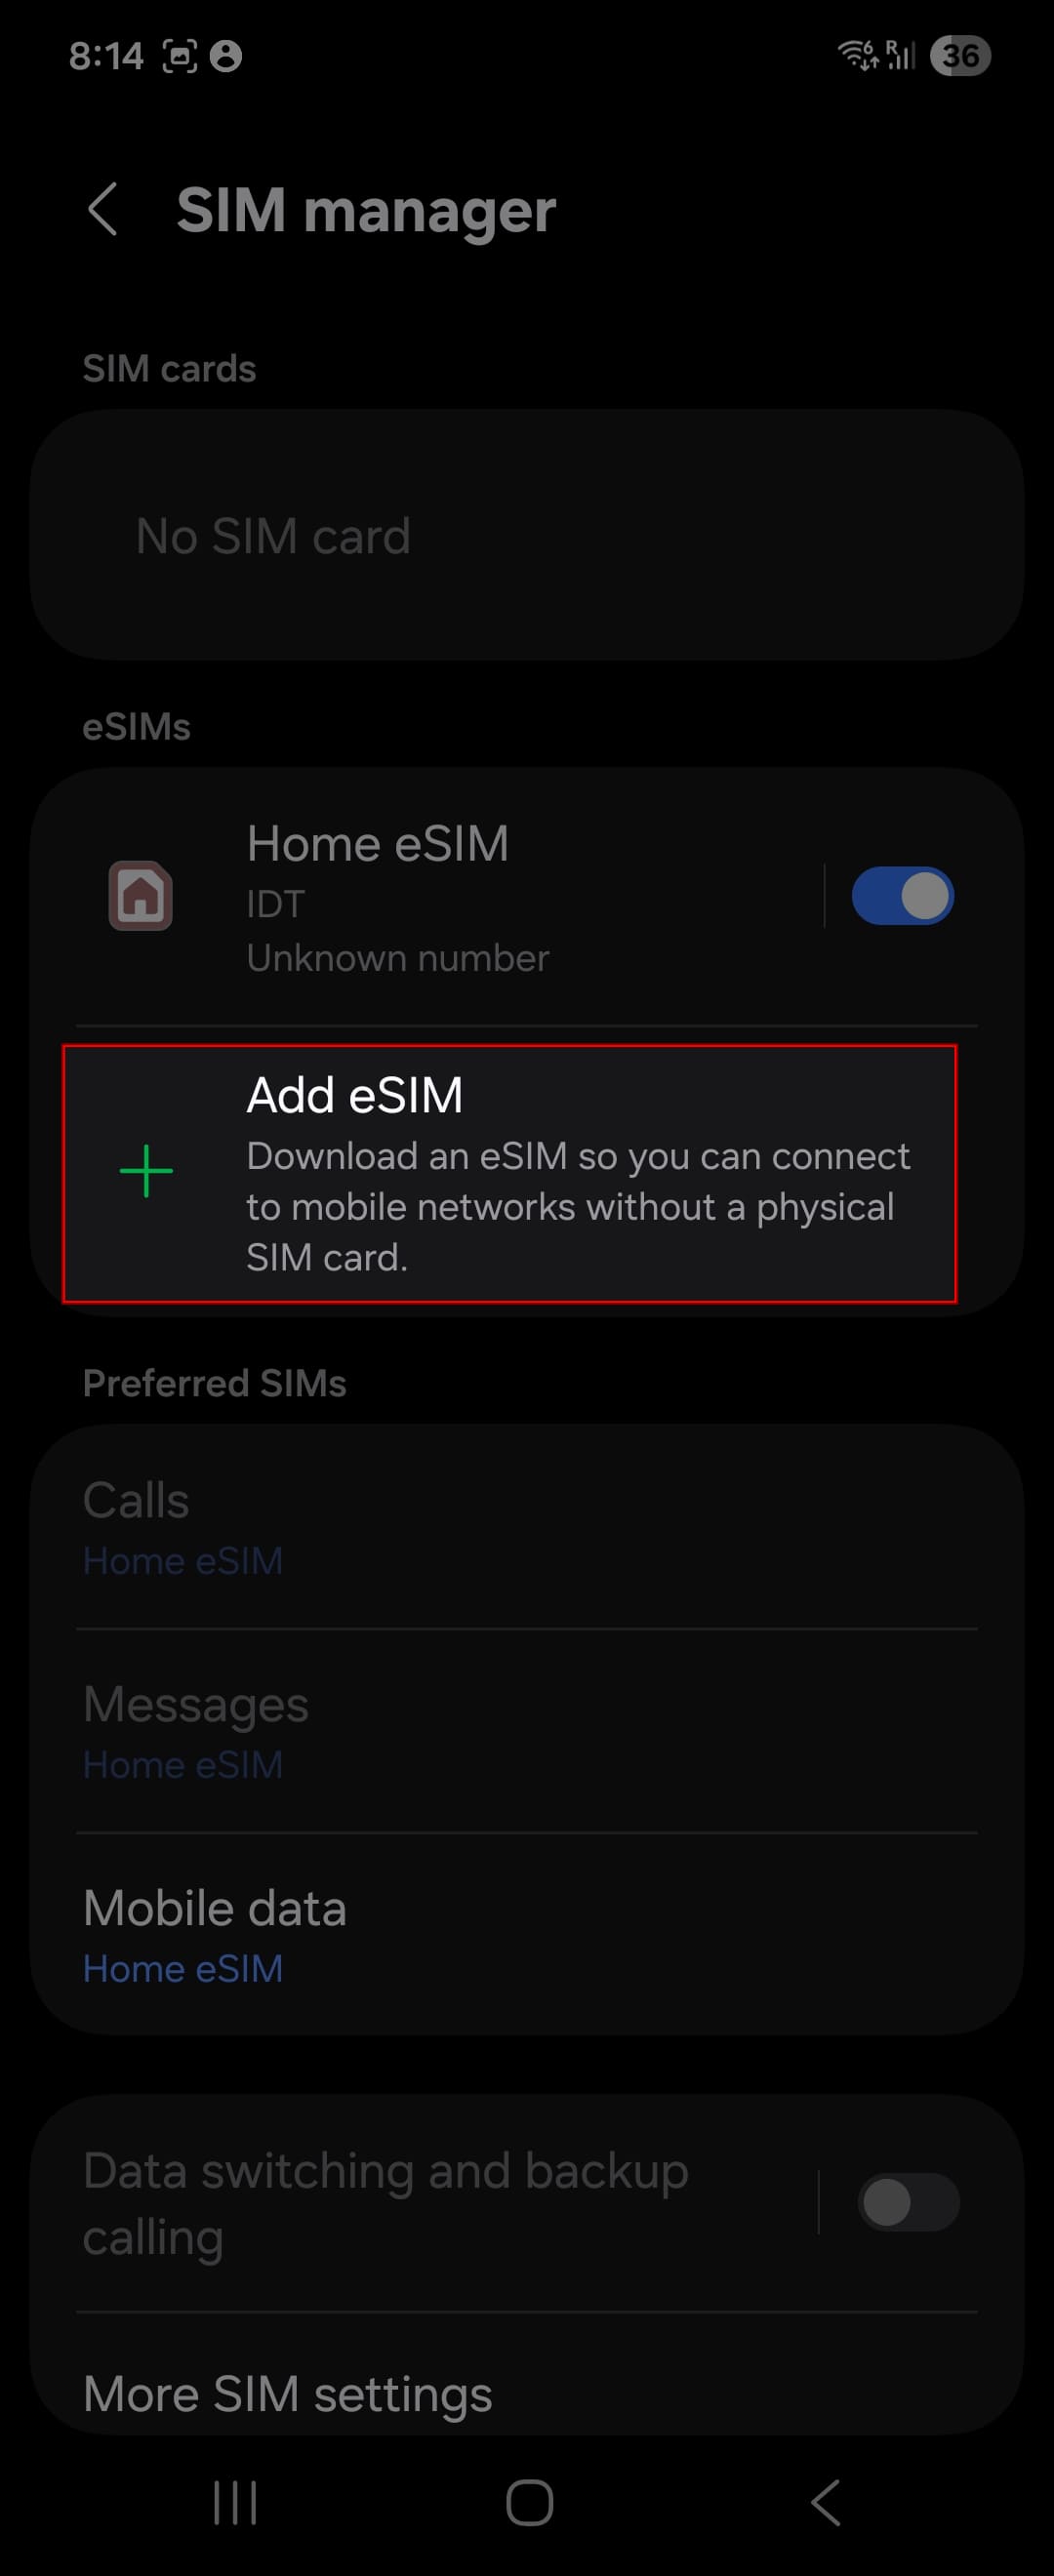
Tap Scan QR code.
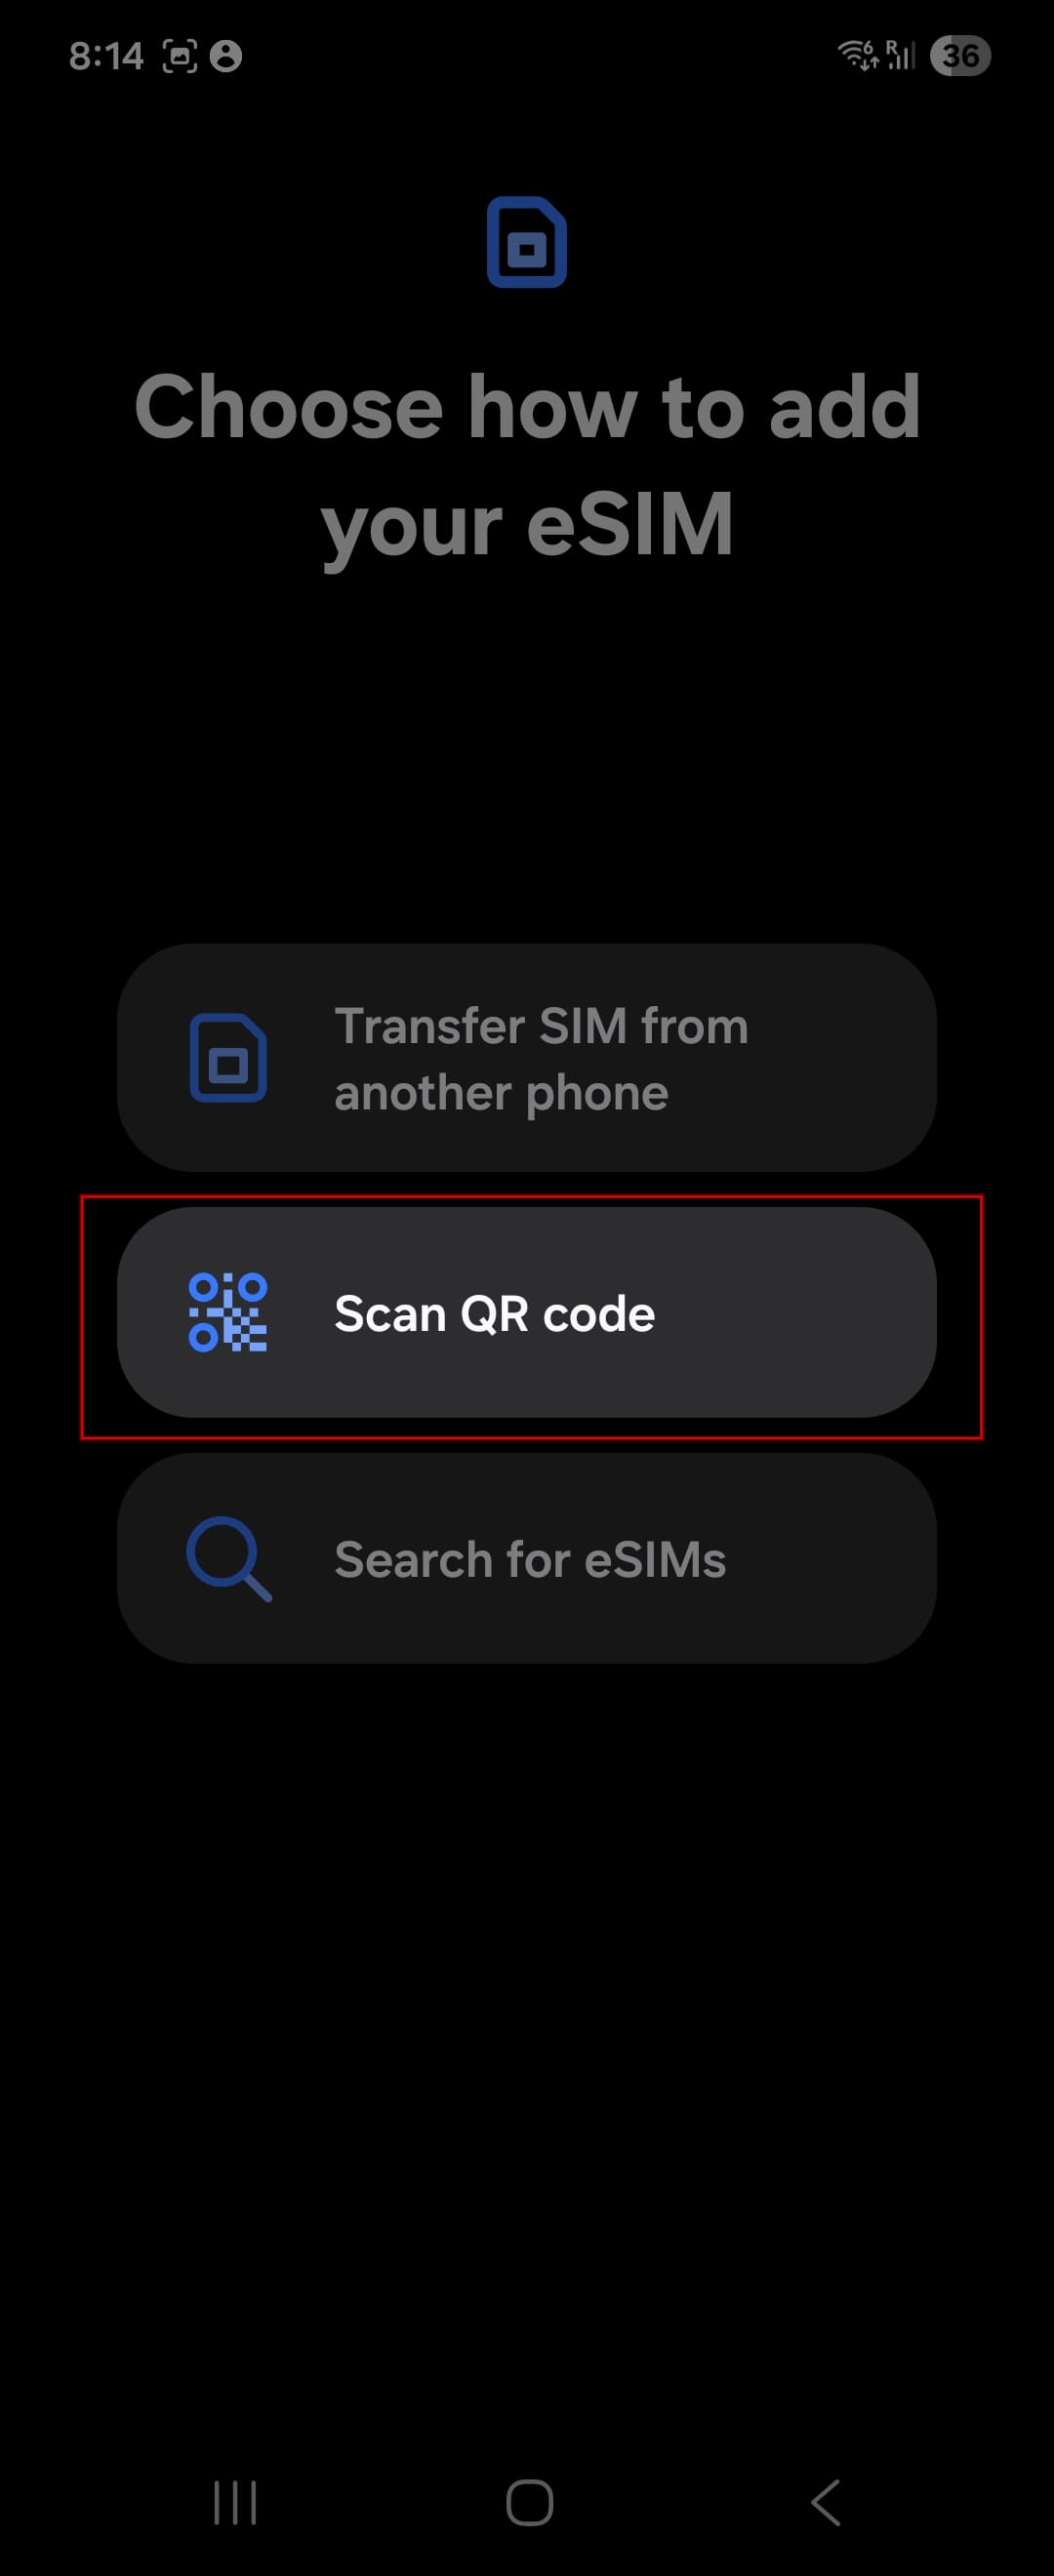
ℹ️ NoteEven if you plan to install using an Activation Code (SM-DP+), you still need to open Scan QR code first.
Choose one of the following options:
Scan the QR code using the camera
Select a QR image from your gallery
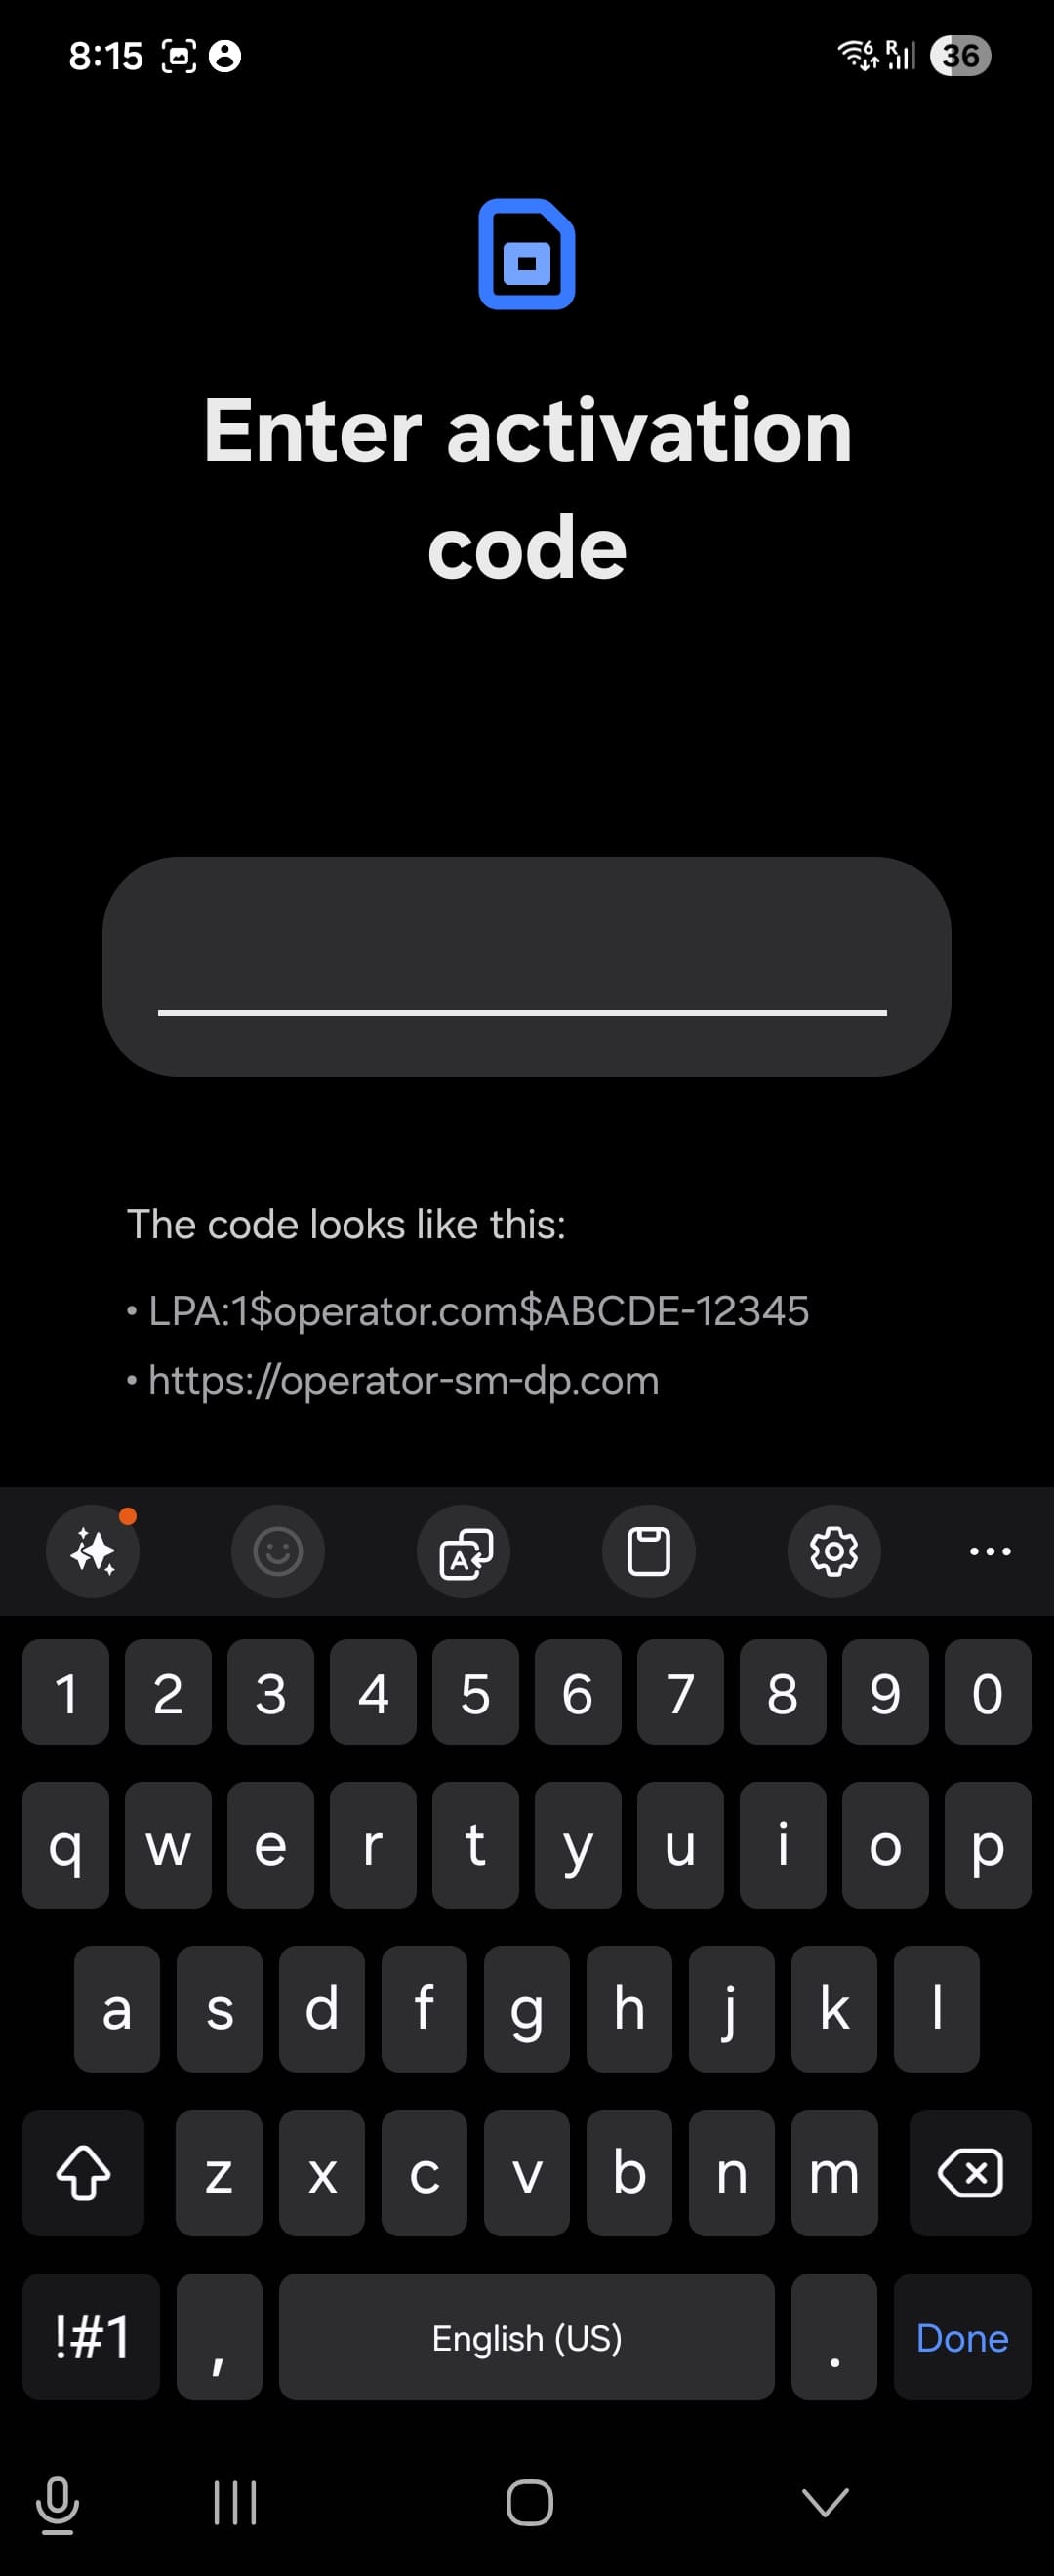
Tap Enter activation code
Open Settings.
Tap Connections.
Tap SIM manager.
Tap Add eSIM.
Tap Scan QR code.
Choose one of the following options:
Scan the QR code using the camera
Select a QR image from your gallery
Tap Enter activation code
In this guide, we’ll install using the Activation Code option.
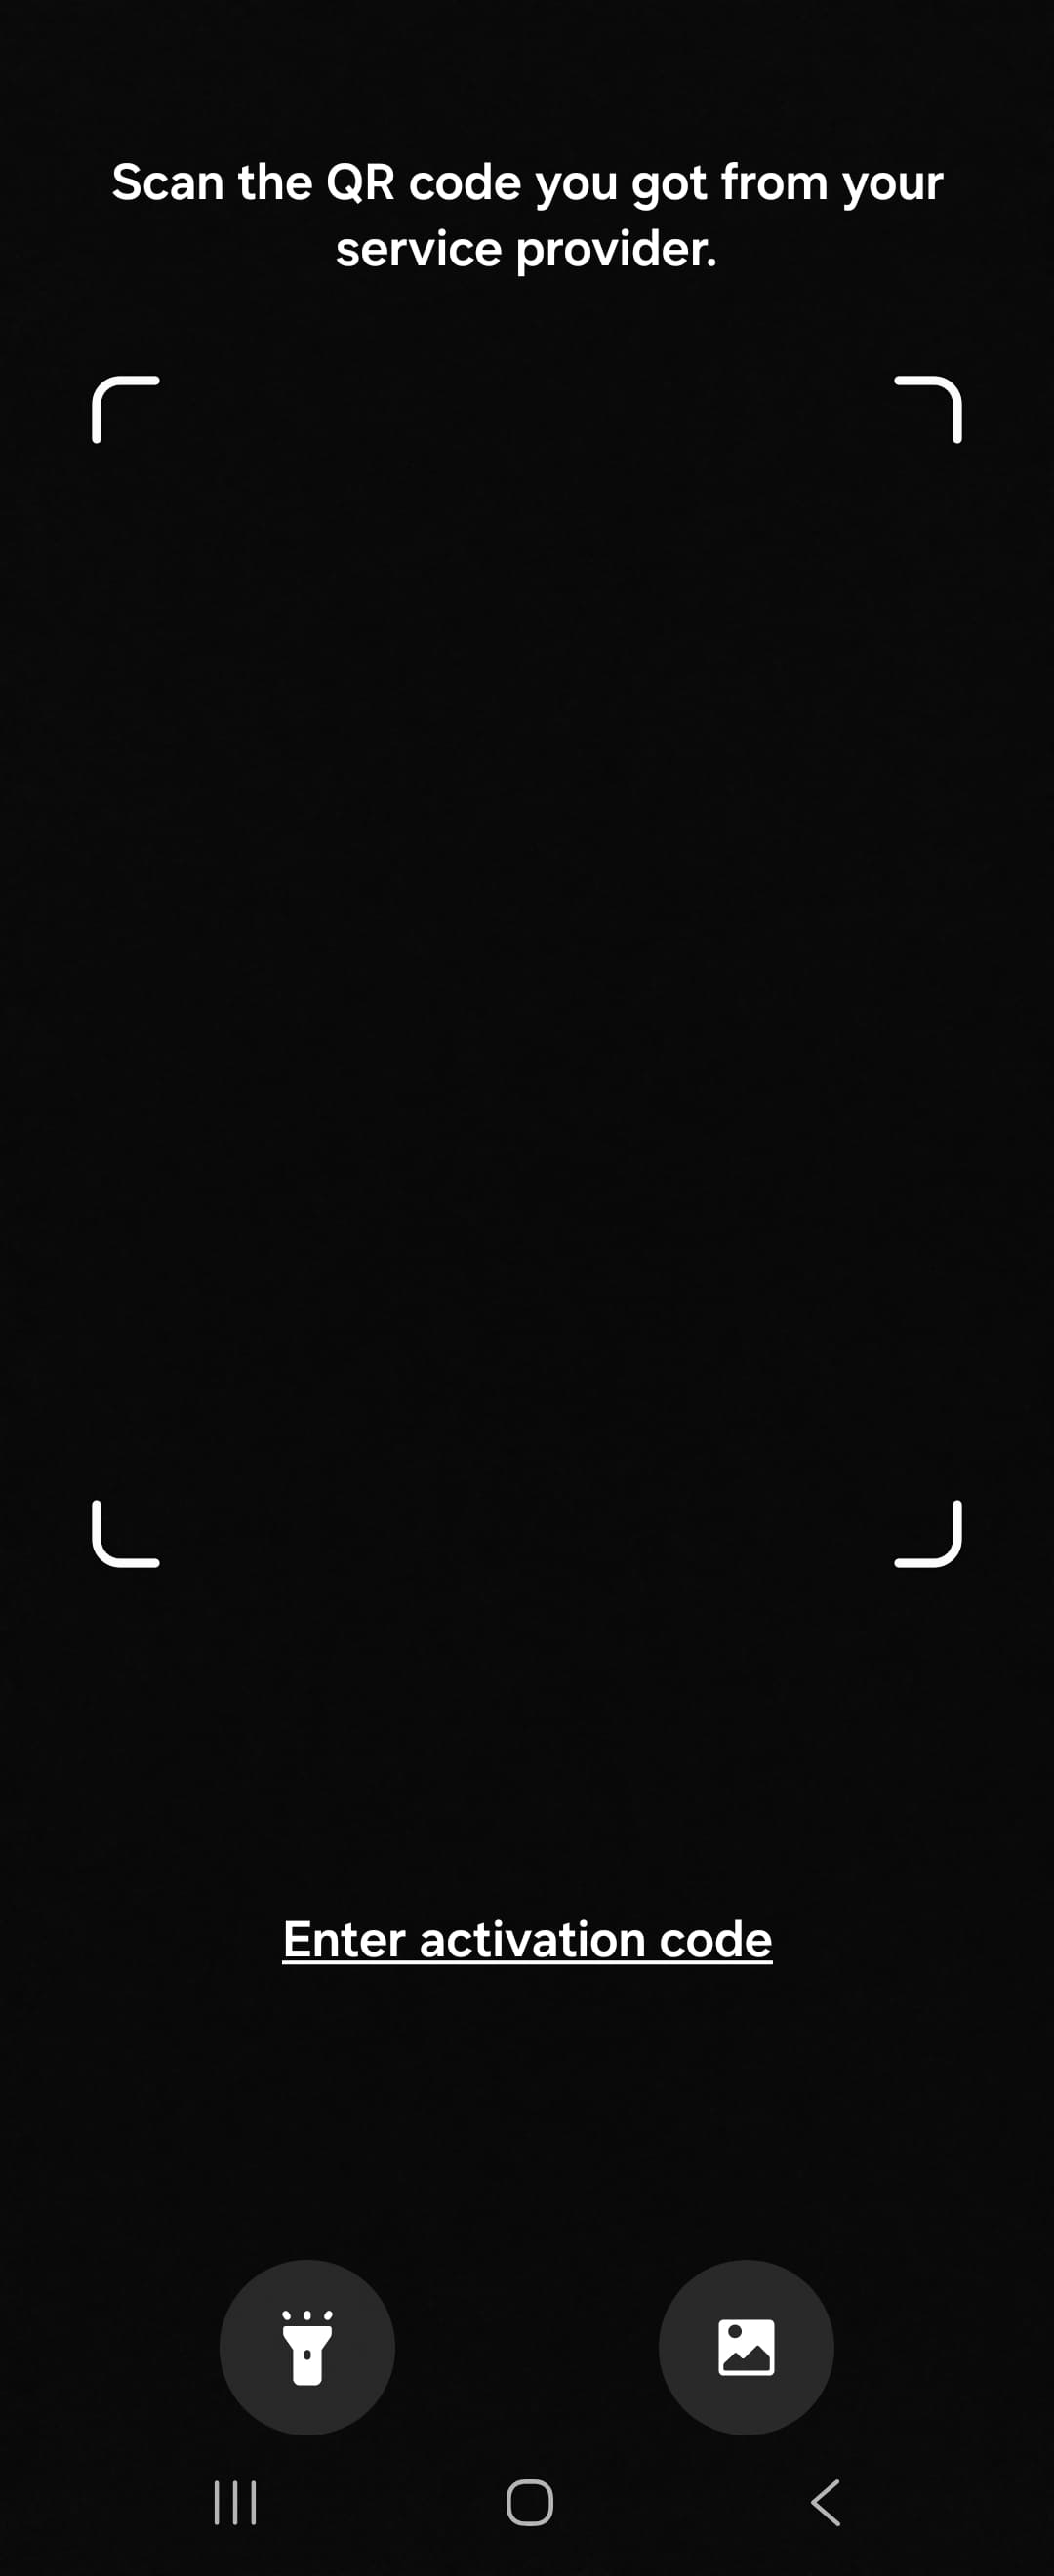
Paste or type the activation code, then tap Done on the keyboard.
Part 3: Confirm installation
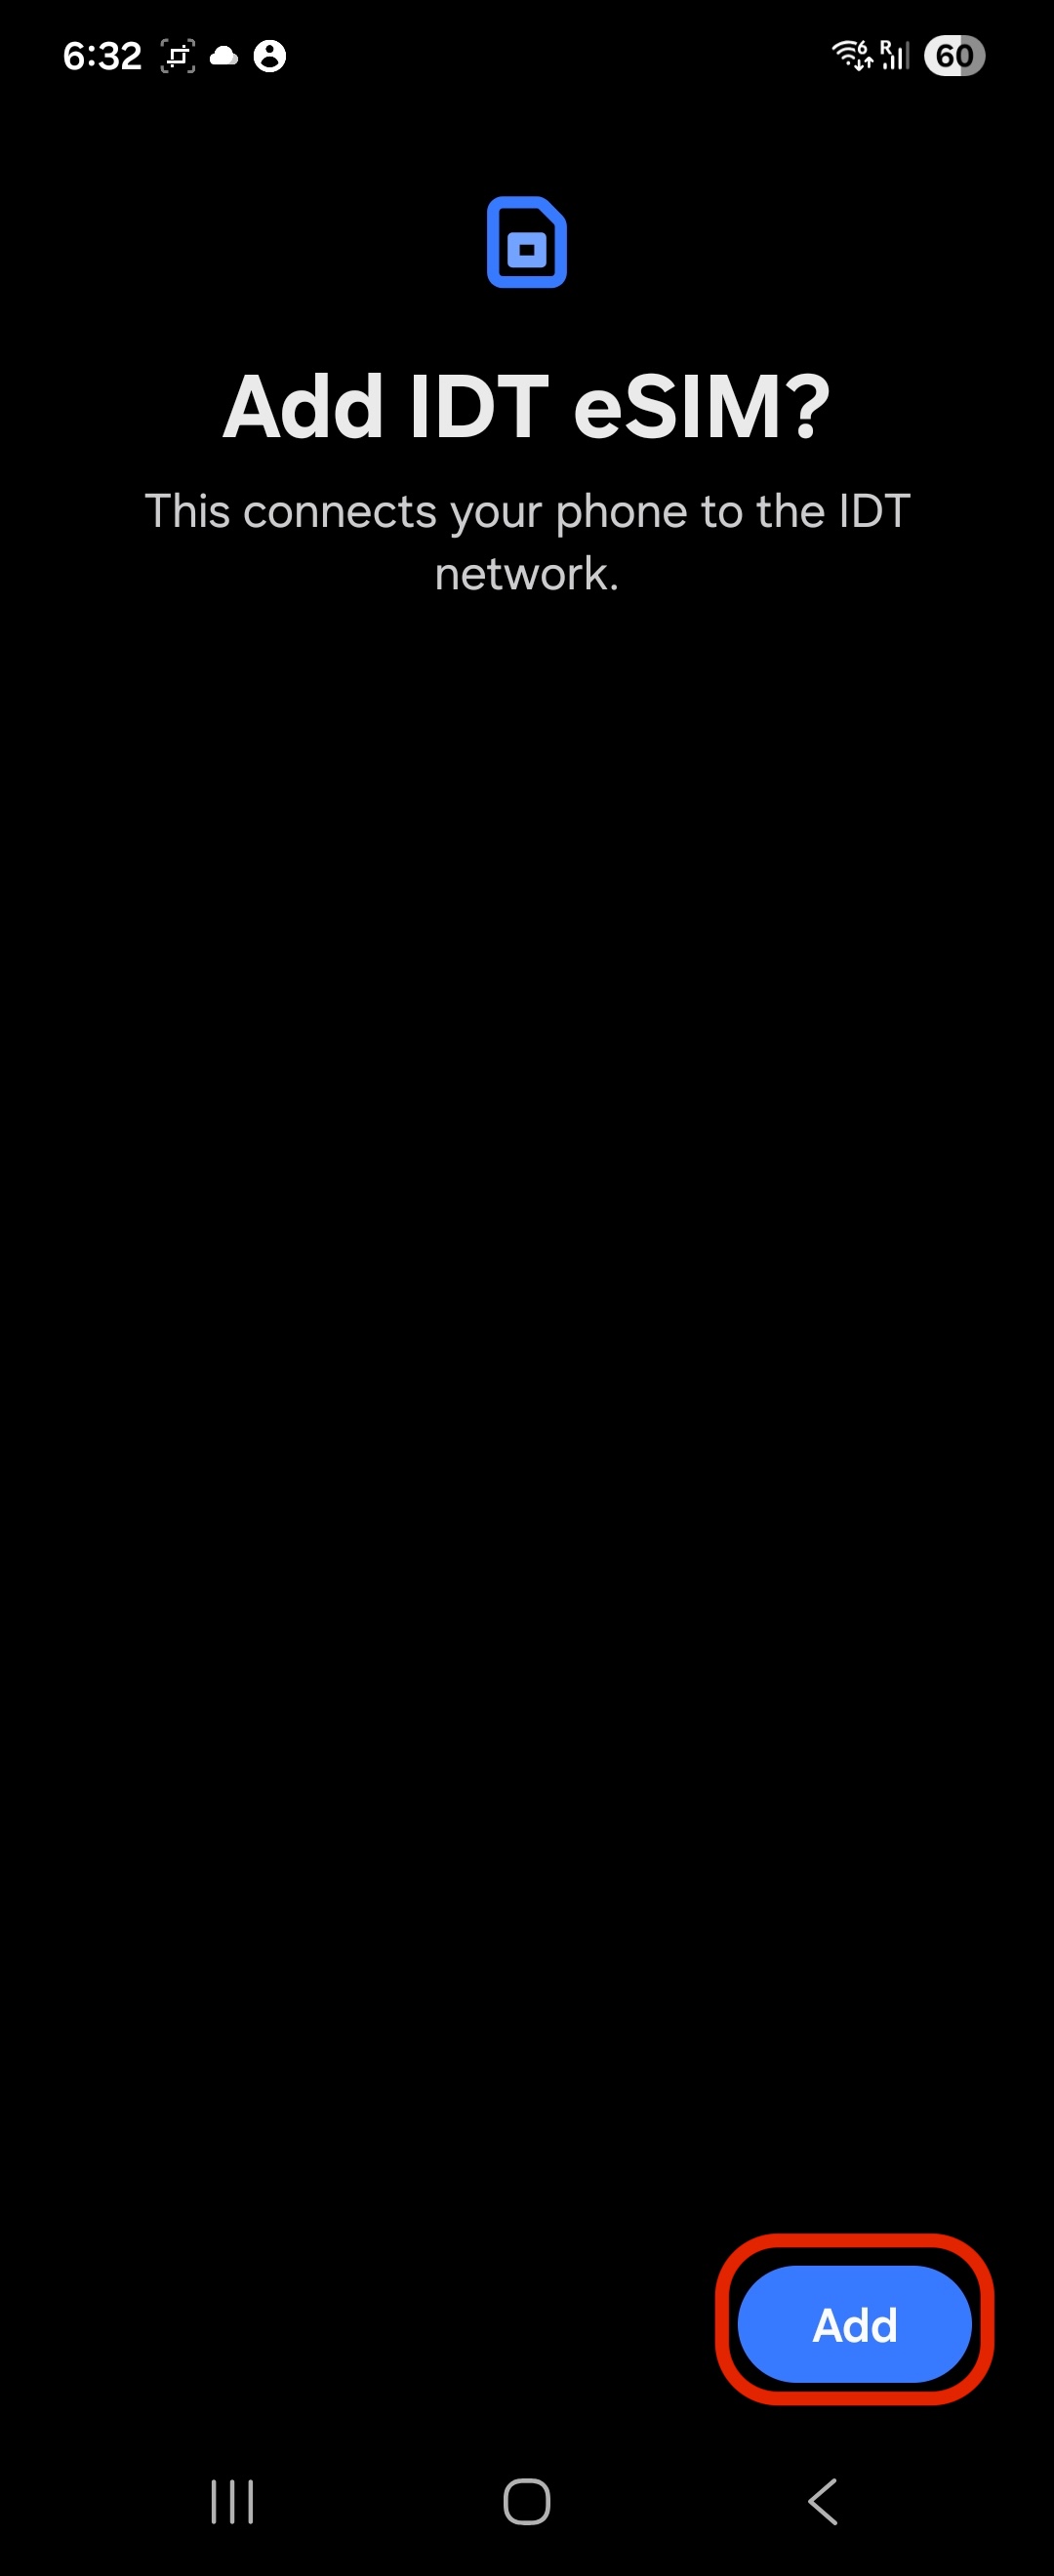
When your phone asks to confirm adding the eSIM, tap Add.
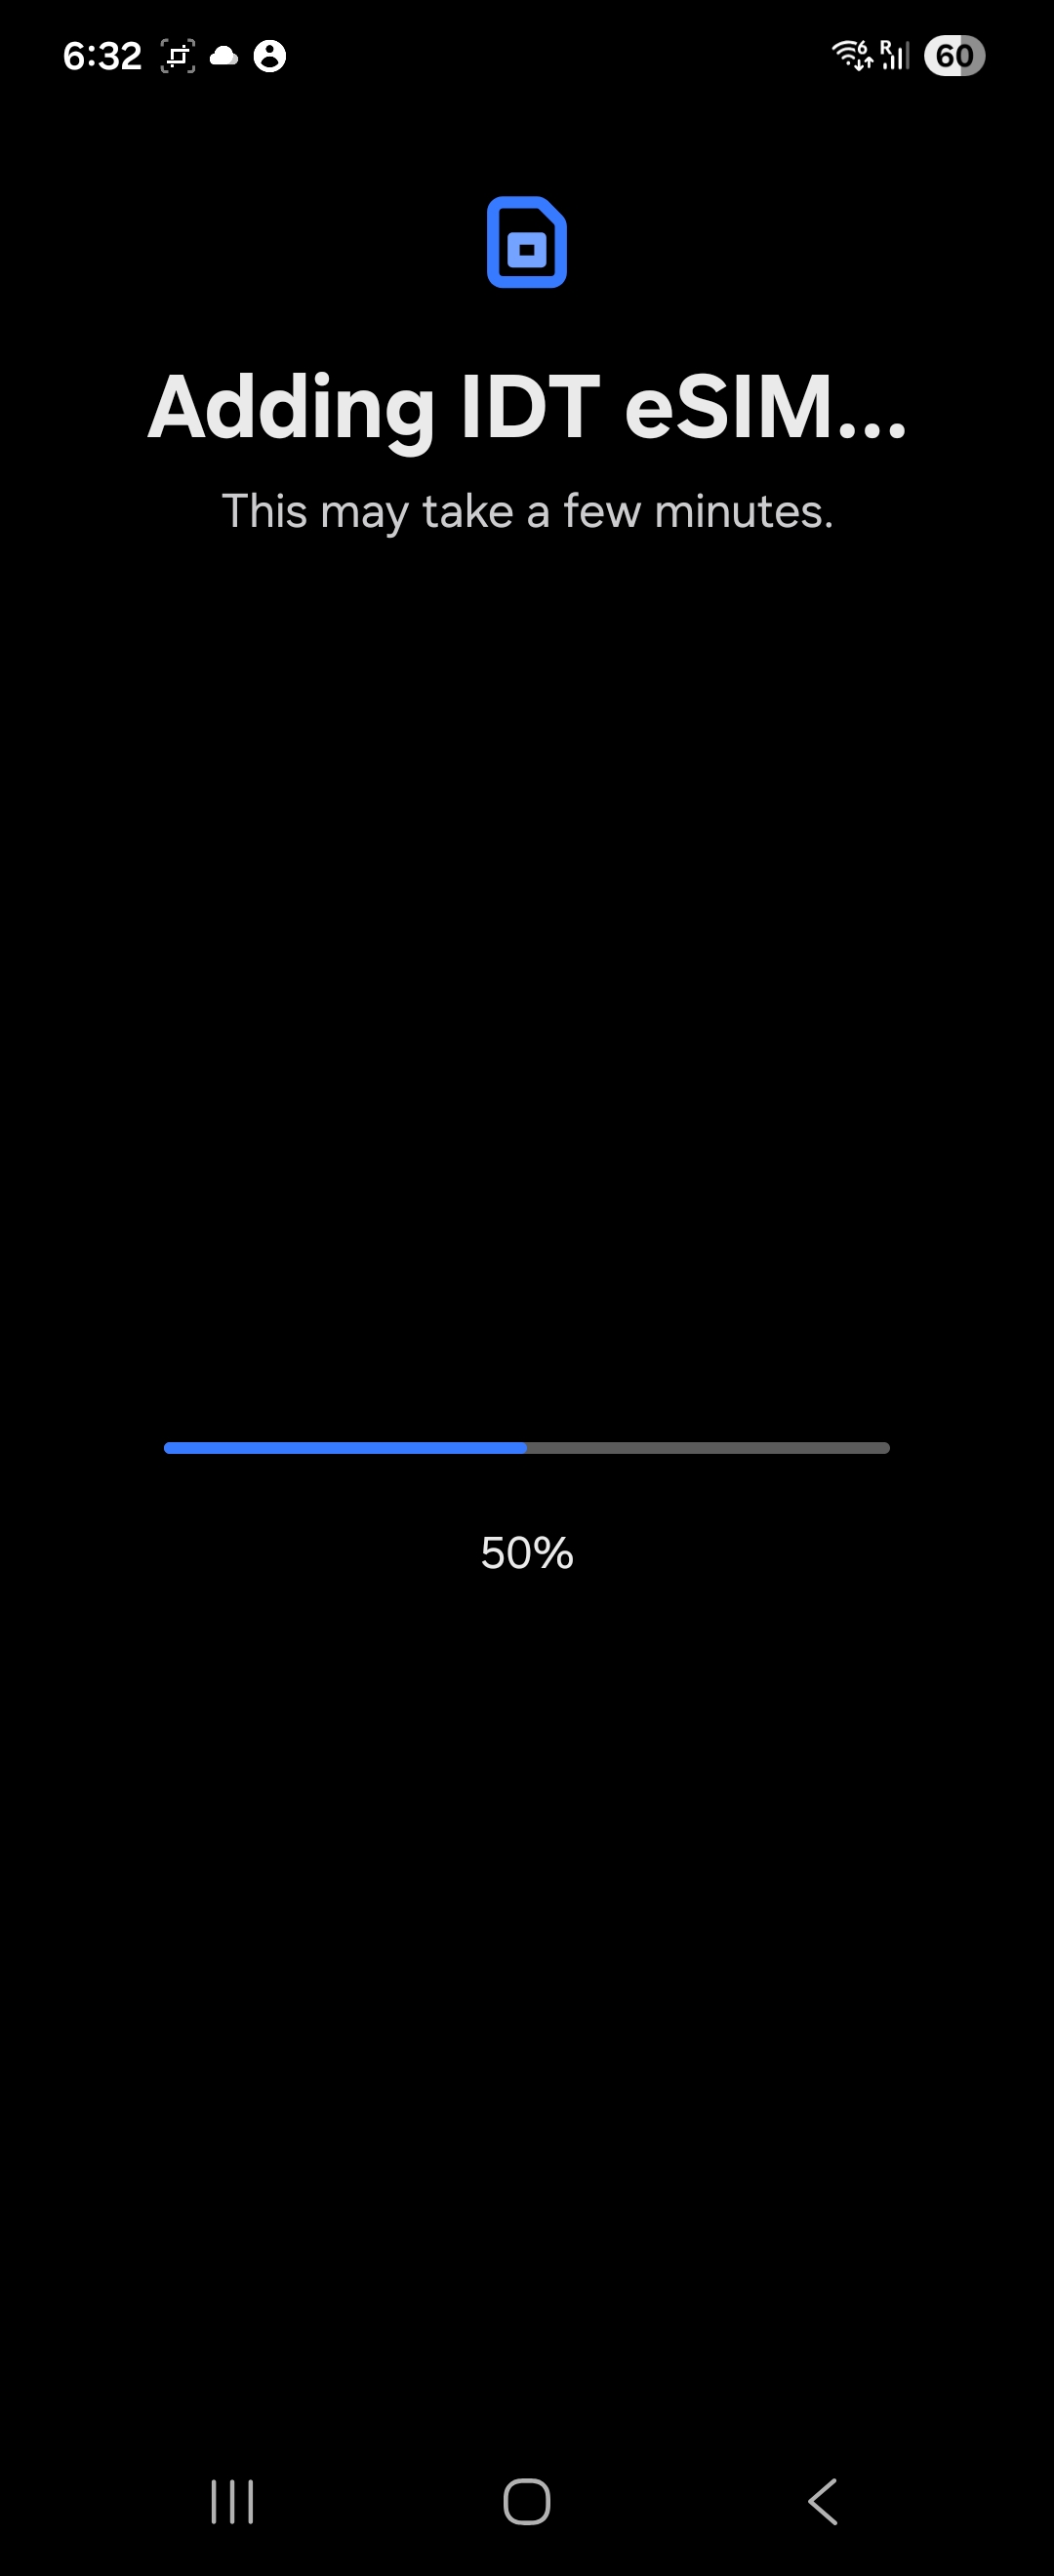
Wait for the installation to complete. This usually takes less than 30 seconds.
When your phone asks to confirm adding the eSIM, tap Add.
Wait for the installation to complete. This usually takes less than 30 seconds.
Part 4 (recommended): Name the eSIM so it’s easy to recognize
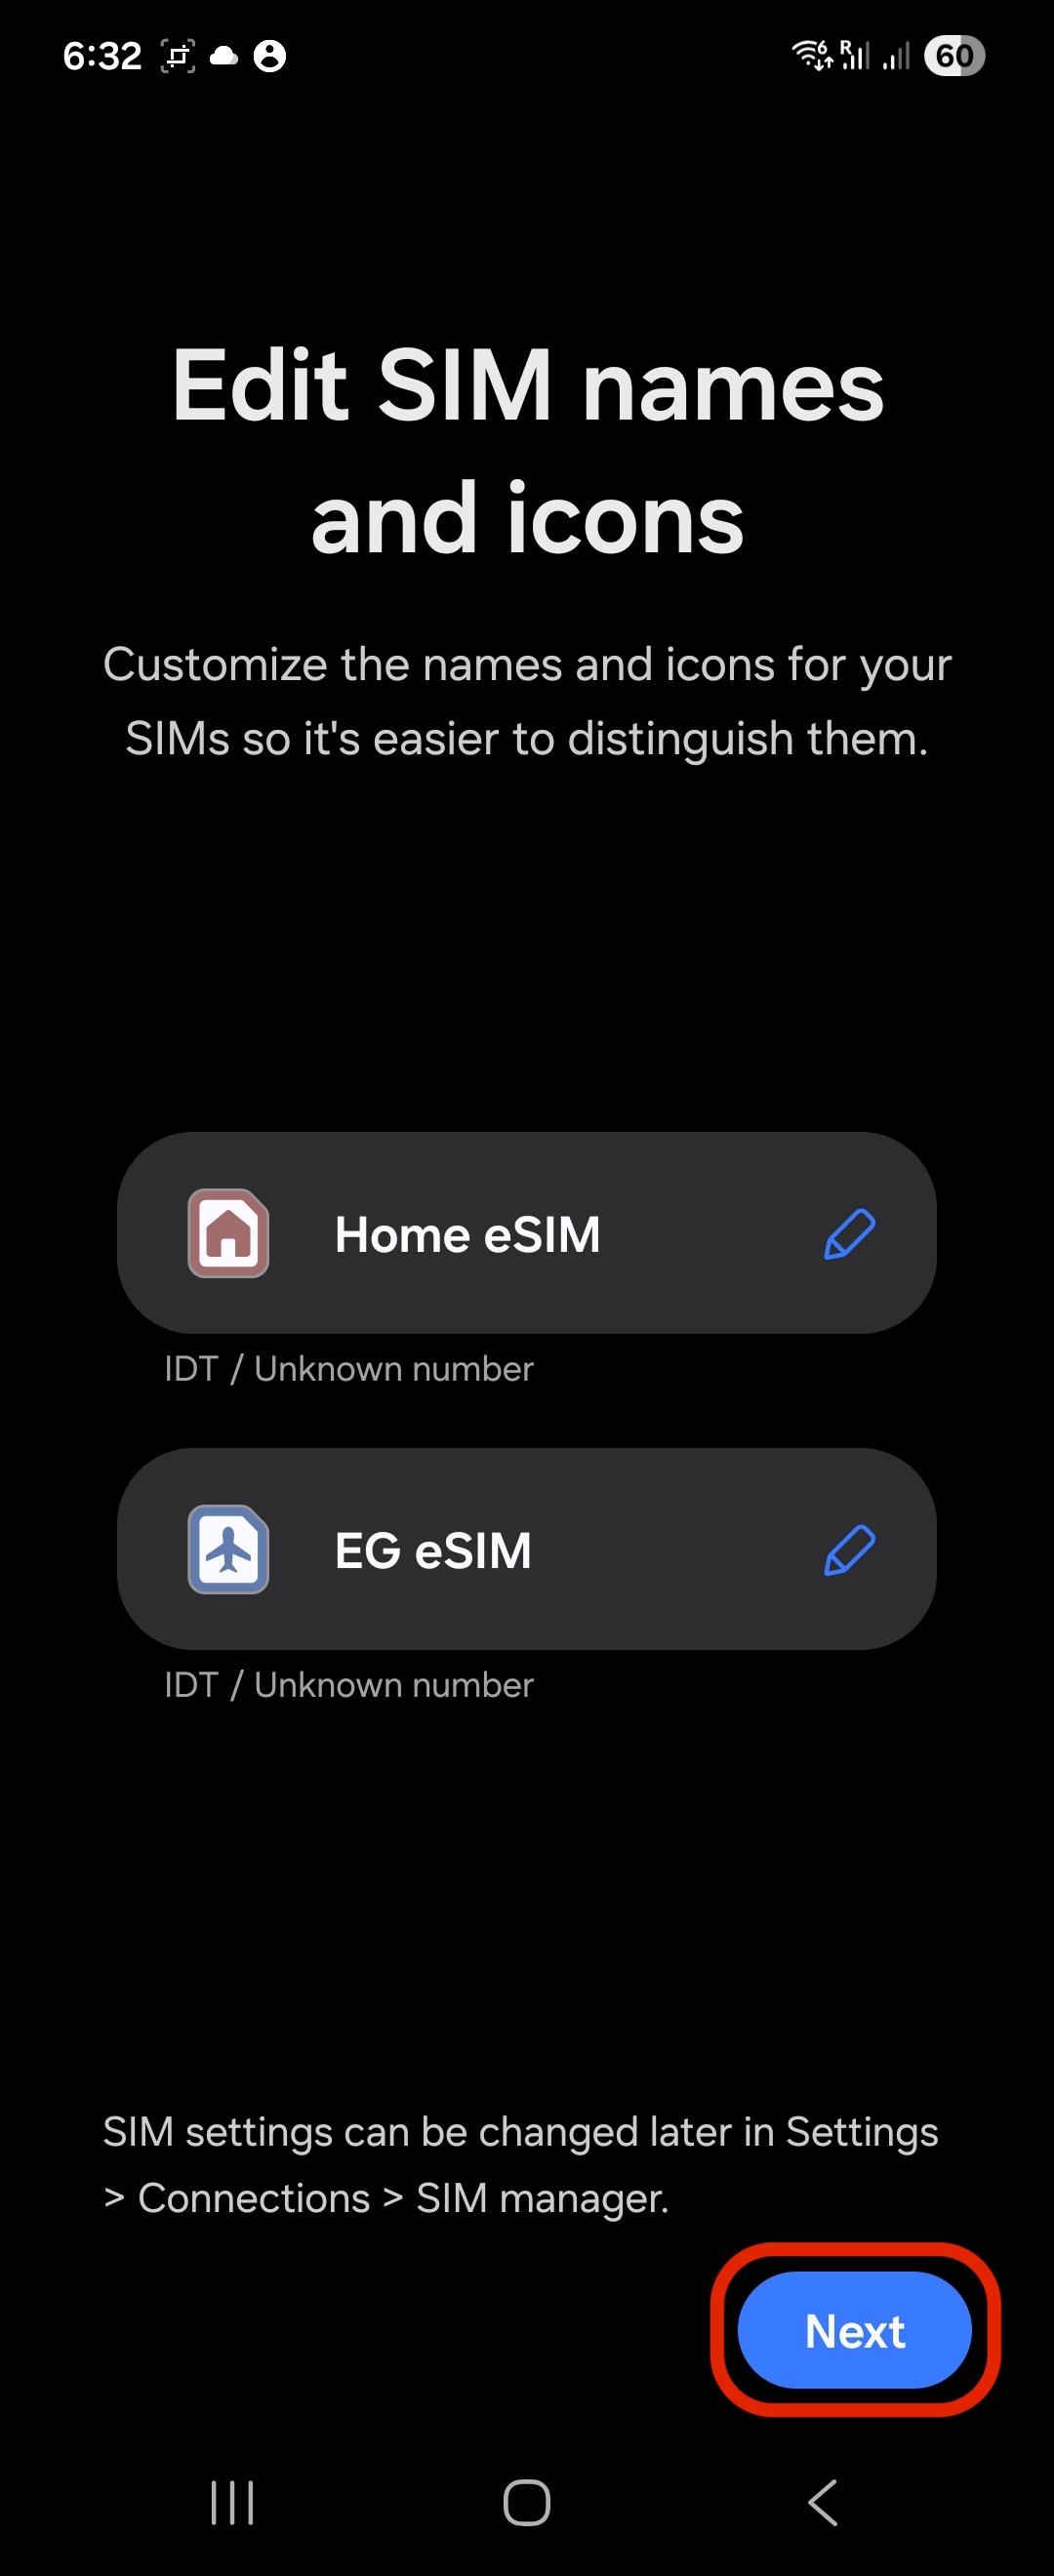
After installation, your phone may show Edit SIM names and icons. Renaming your eSIM helps you select the correct line later (for mobile data, roaming, and troubleshooting).
On Edit SIM names and icons, enter a clear name such as DataFly, then tap Next.
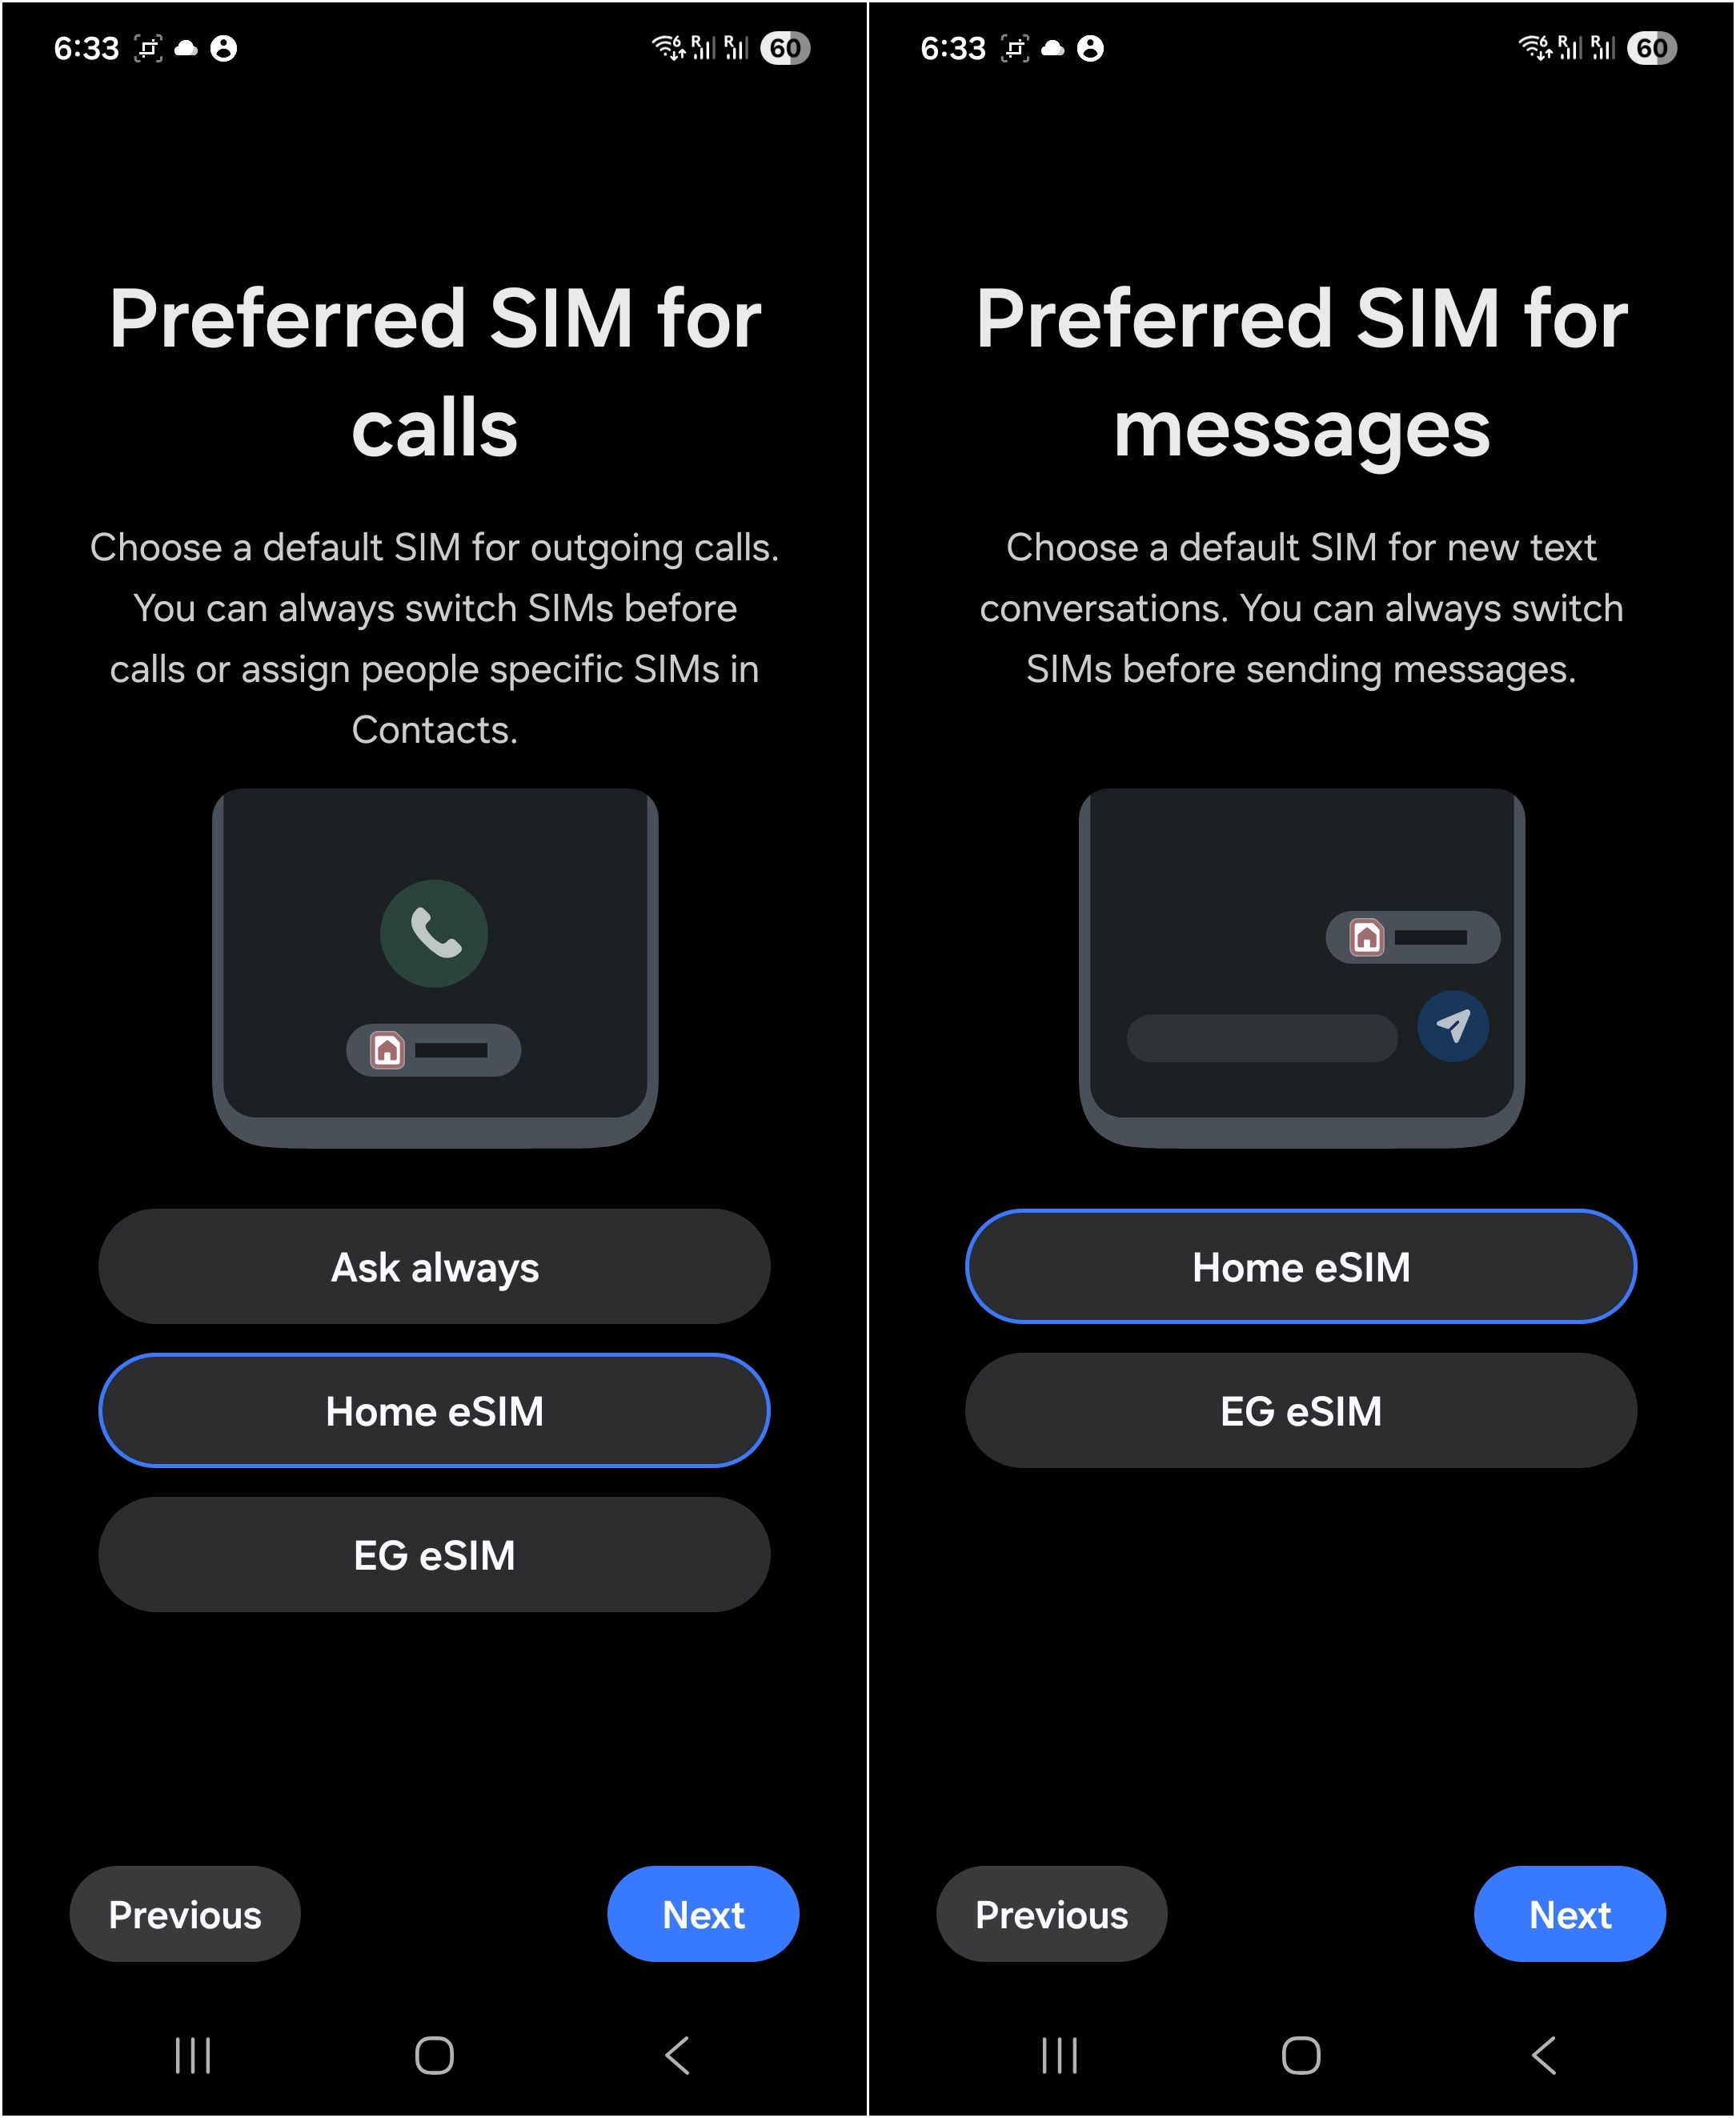
If prompted to choose the preferred SIM for Calls and Messages, select your usual primary SIM, then continue.
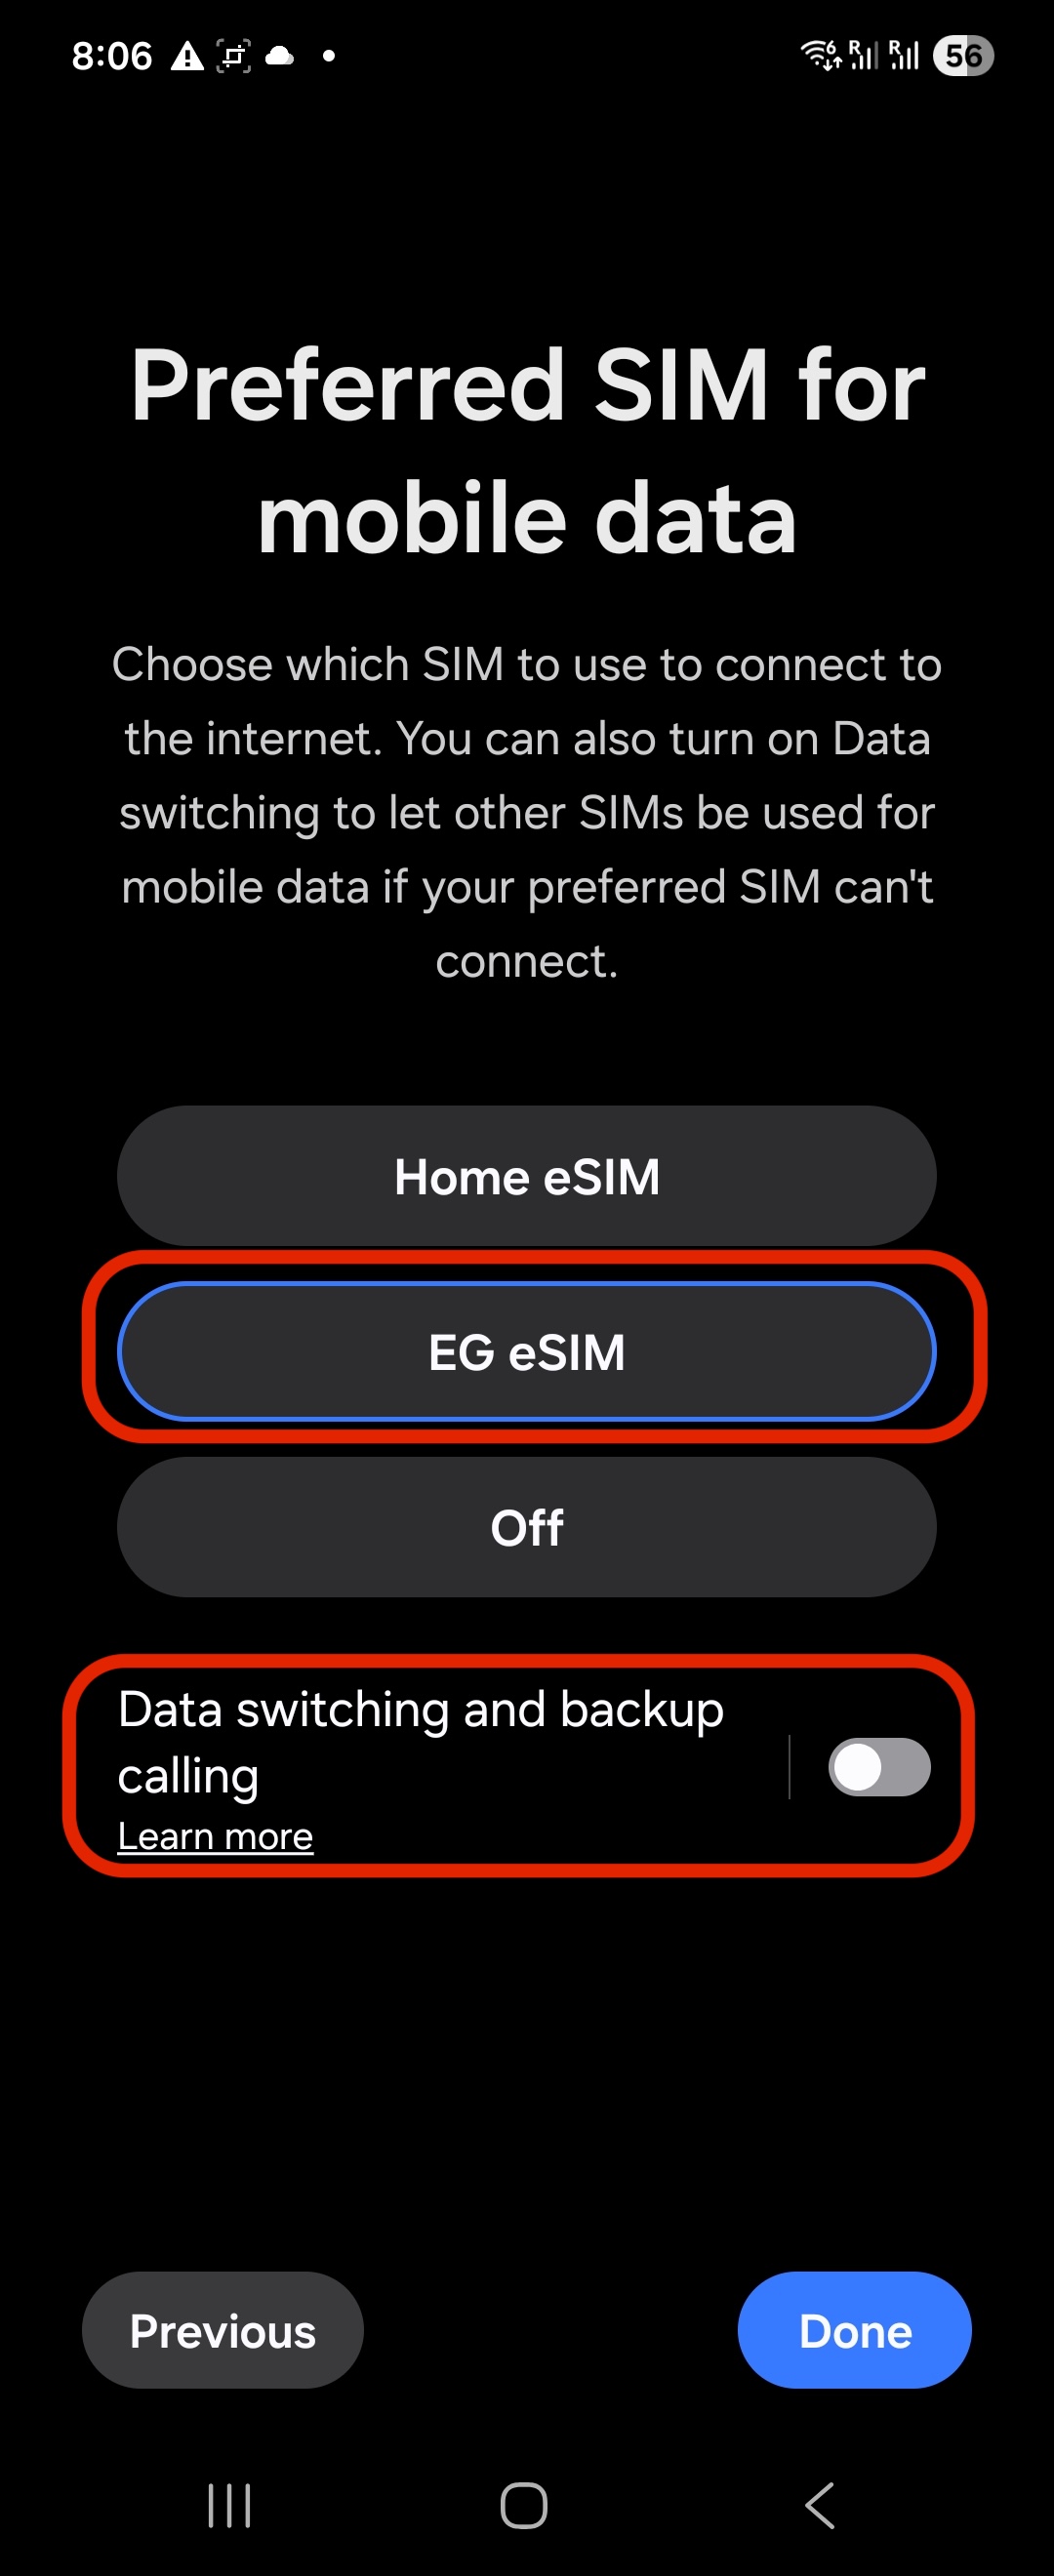
When asked to choose the preferred SIM for Mobile data, select your DataFly eSIM.
On Edit SIM names and icons, enter a clear name such as DataFly, then tap Next.
If prompted to choose the preferred SIM for Calls and Messages, select your usual primary SIM, then continue.
When asked to choose the preferred SIM for Mobile data, select your DataFly eSIM.
Part 5: Enable data roaming for the DataFly eSIM
To use mobile data while traveling, Data Roaming must be ON for the DataFly eSIM. To avoid unexpected charges, it is strongly recommended to keep roaming OFF on your primary SIM.
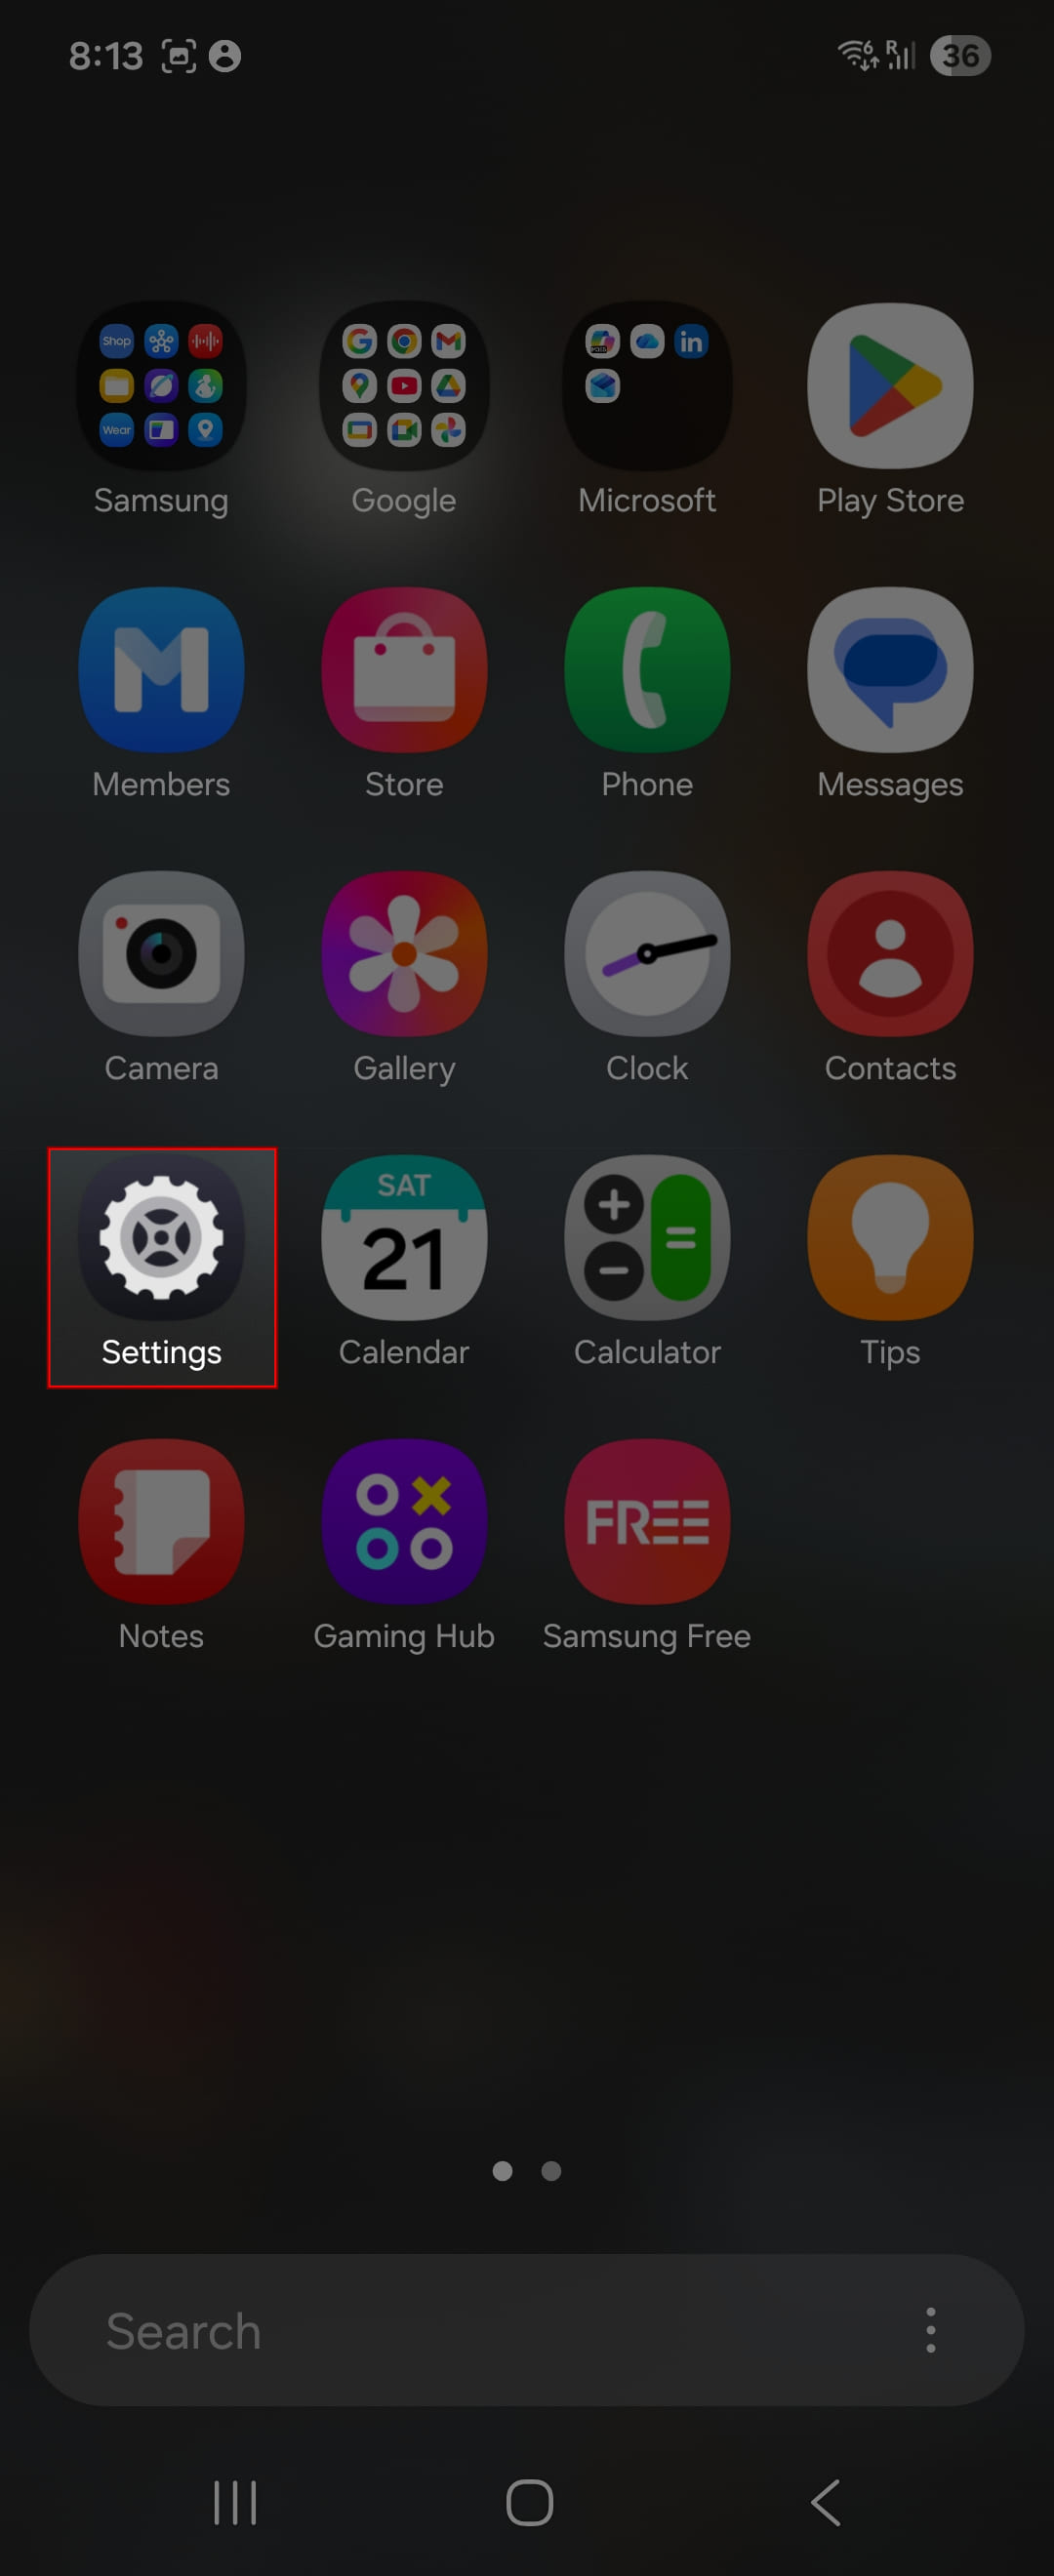
Open Settings.
Tap Connections.
Tap Mobile networks.
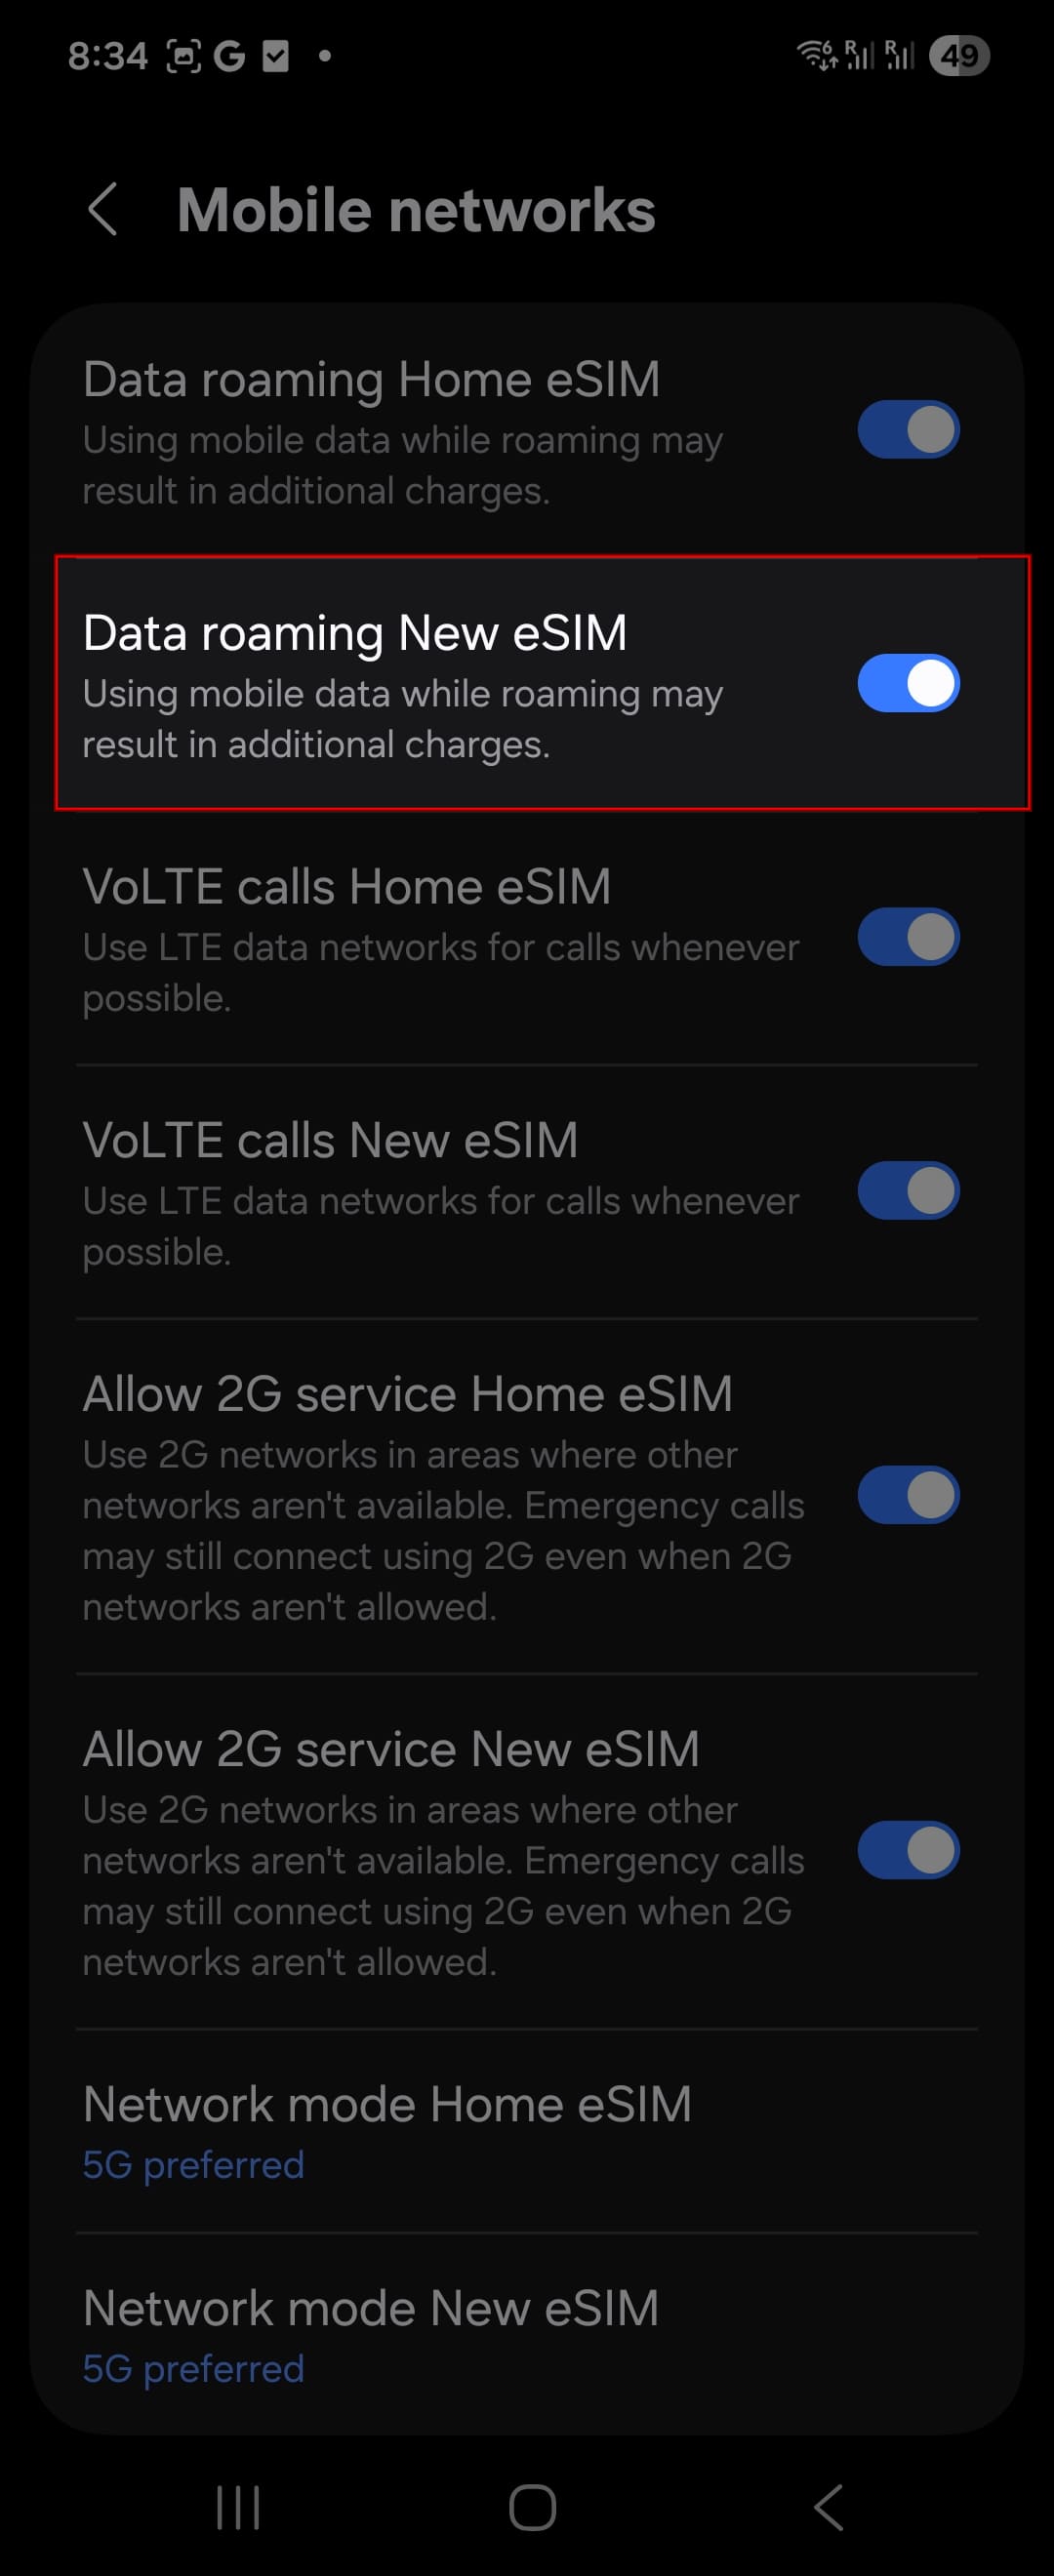
Set Data roaming as follows:
ON for the DataFly eSIM
OFF for your primary SIM (your regular local line)
Your eSIM is now ready to use. ✅
If data does not work after setup
Toggle Airplane mode on for 5 seconds, then turn it off.
Restart your phone.
Confirm Mobile data is set to the DataFly eSIM and Data roaming is ON for that eSIM.
Toggle Airplane mode on for 5 seconds, then turn it off.
Restart your phone.
Confirm Mobile data is set to the DataFly eSIM and Data roaming is ON for that eSIM.